

WooCommerce is now a widely used tool where you can easily set up an eCommerce website with ease. eCommerce is used because people love WordPress websites and they want to start using WordPress for their eCommerce needs. You can easily set up and create an eCommerce store with this. The problem starts when you want to integrate a payment gateway with it. When you are planning to integrate the payment gateway, you can use multiple options.
With that being said, this tutorial is all about how you can set up PayPal in your WooComemrce store and things can start rolling with ease. We will see the exact way using which you can do this.
Now, there are a couple of ways where you can use PayPal.
One is by the default way where anyone can enter their email address and things will start rolling. The next is by the official business account. When you are planning to go with the official account, you will also need to set up the basic things at first. In simpler words, you will have to submit the documents. The number of documents depends on the country you reside. In some countries, you don’t need anything whereas, in some countries, you will have to register your business if you want to receive the payments.
Of course, we will see both ways here. At first, we will see the default way using which you can get the payment, and then we will see the standard way where you will need to create a PayPal business account.
How to Setup Regular PayPal?
At first, we will see how to set up a regular PayPal account. In simpler words, this comes in-built. So, you don’t even need to do a lot of things to set up the account.
Let’s see how you can do it.
Create a PayPal account
At first, you will have to create a PayPal account. This is one of the easiest things you can do. You can simply head over to the official website of PayPal and then create an account with few clicks.
They will ask you for some basic information, you can enter all the things in the information and you are all set. This is where you have created a PayPal account.
Now, PayPal will further ask you to confirm the details. You can easily confirm the details and you are all set.
Setting up PayPal
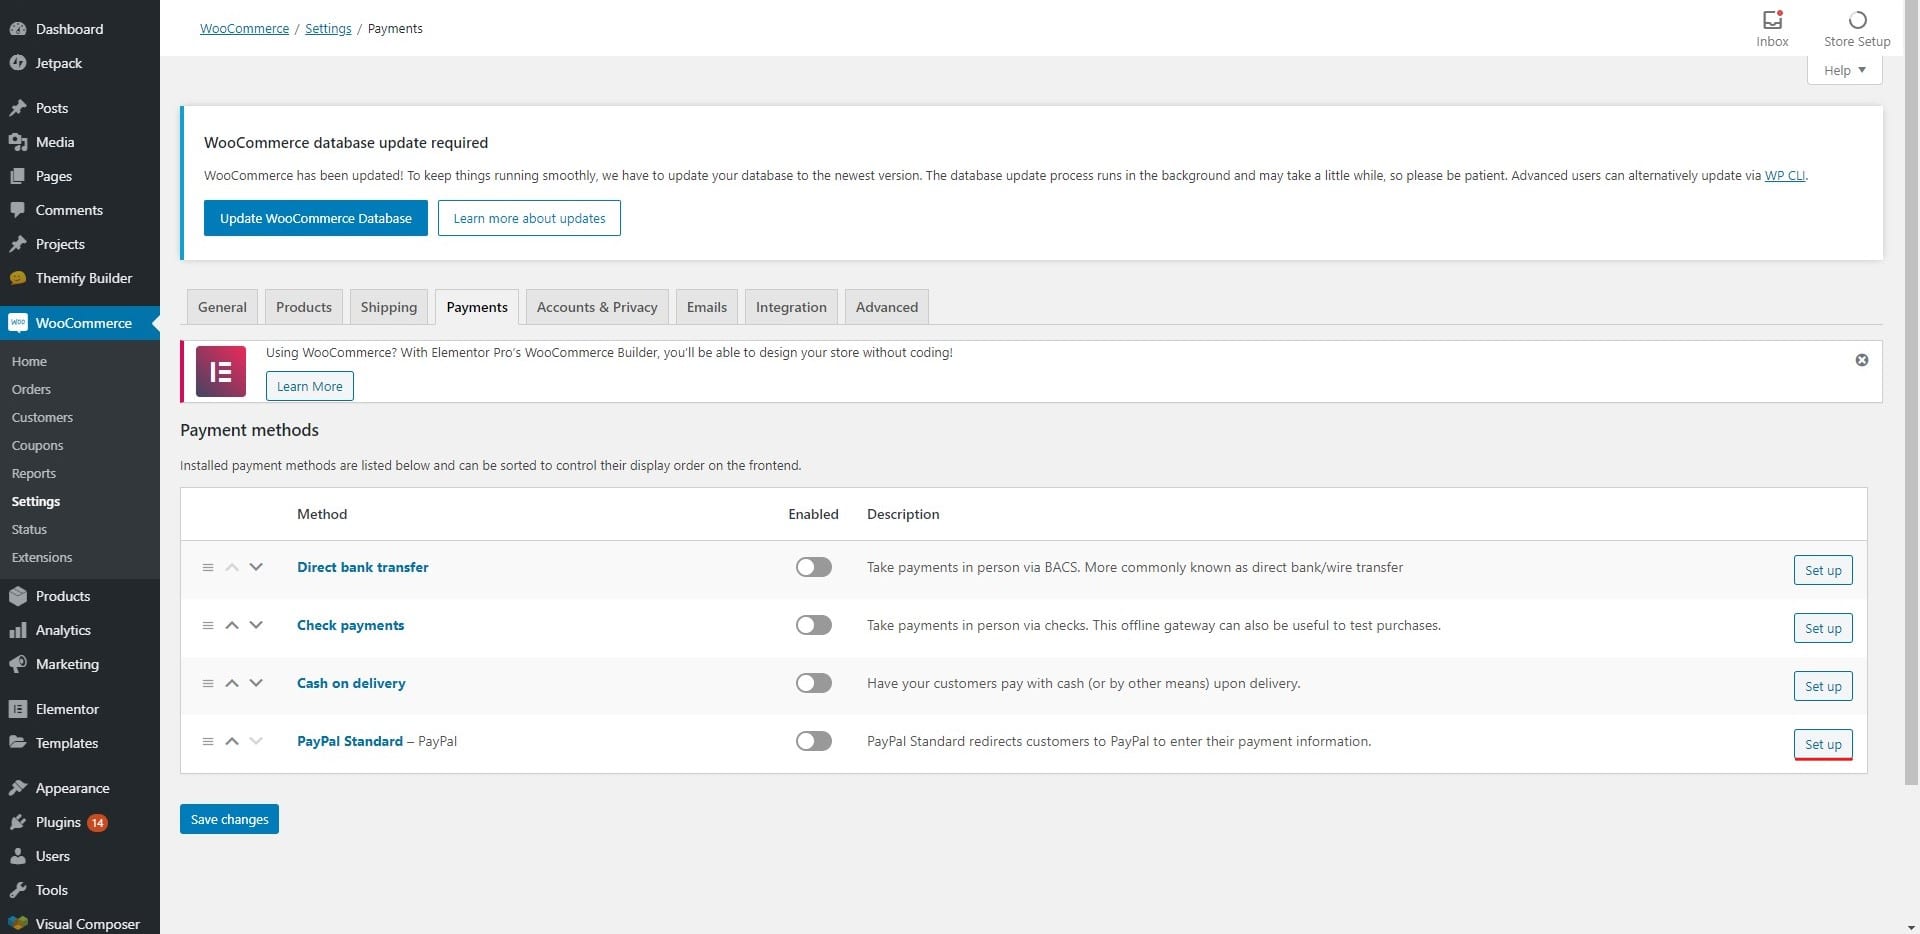
Now, you will have to set PayPal in your WordPress. For that, you will have first have to head over to the main website where you need to set up your PayPal account. You need to enter the email address in your WooCommerce payment settings.
For that, you can simply head over to WooComemrce > Settings > Payment and then turn on PayPal checkout. You can easily enable the PayPal checkout with the toggle switch.

When you toggle on the switch, you can easily set it up. There will be a “Set up” option next to it. You can click on it and it will show you the place where you can configure it.
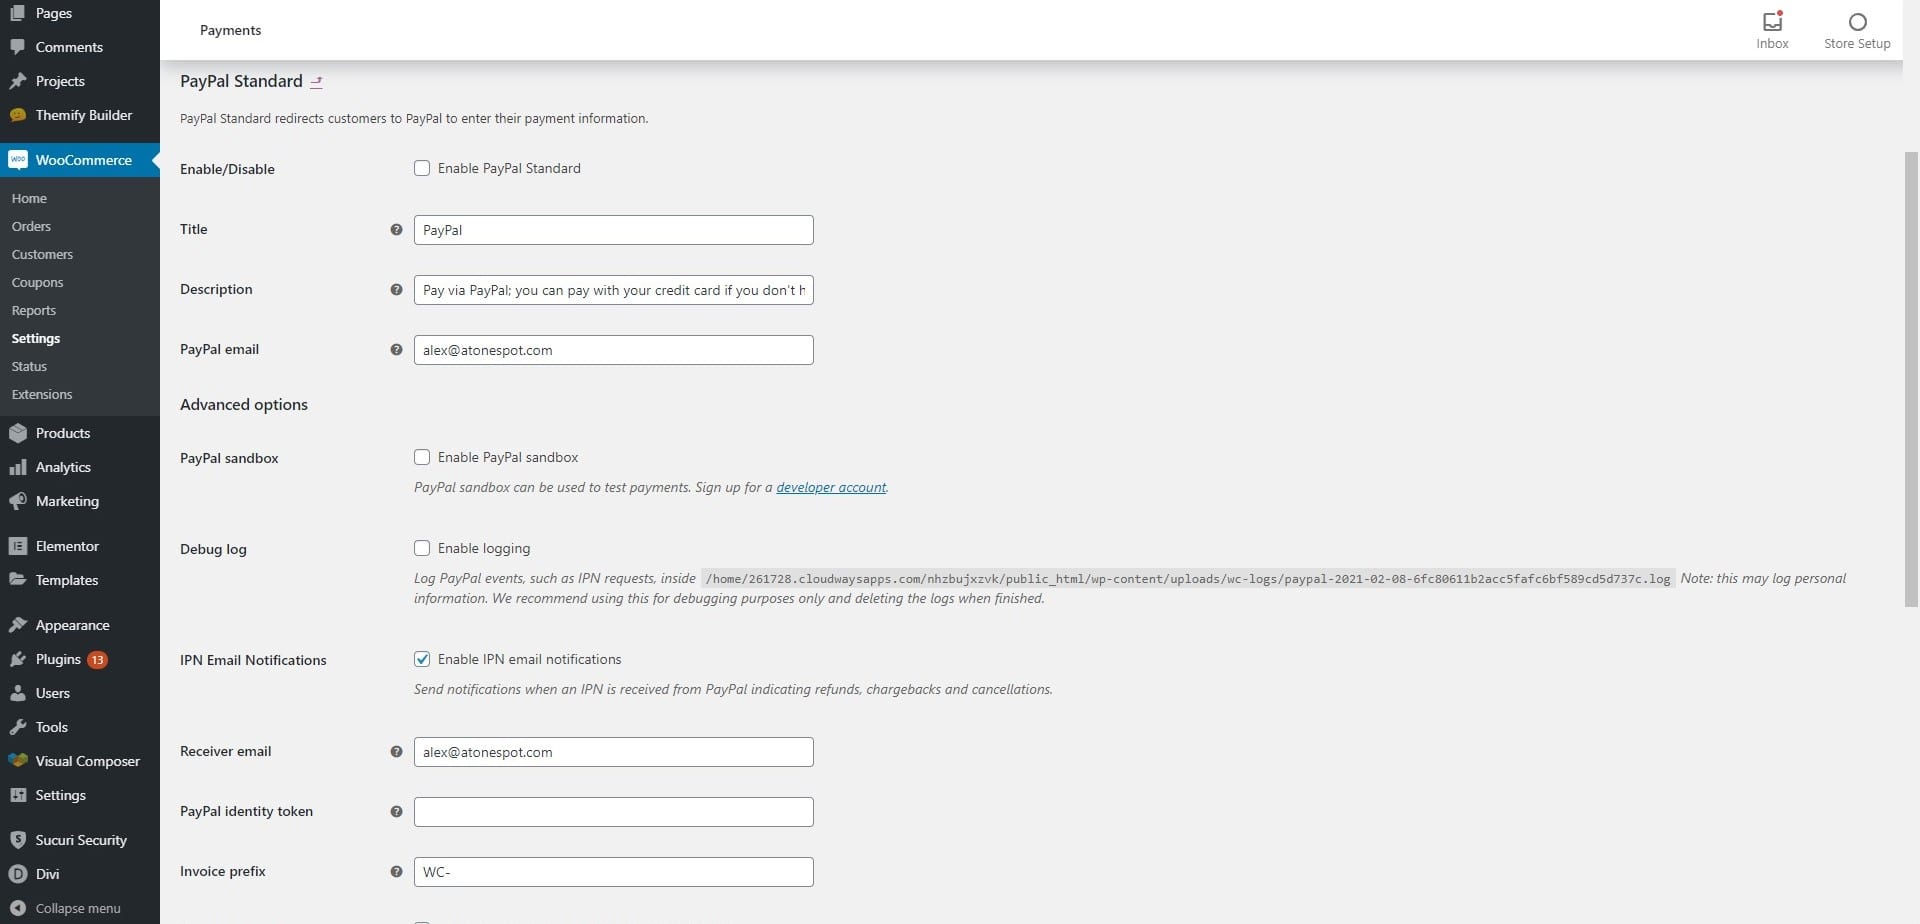
You can simply enter your email address in the section and you are all set. This will enable PayPal payments. You can also enter other stuff such as the name displayed on the checkout page and the text you want to display.
Once you do all these things, you can simply hit the save button and you are good to go here.
You can also set up PayPal when you are setting up WooComemrce. If you have not yet installed WooCommerce, you can simply enter your PayPal email address and you are good to go. This is the easiest way you can set up and start accepting payments from PayPal.
Email Address
The main problem here is that the email address will be public. Everyone will see your email address when they make the payment. The solution you have for this is to change your email address to the one which you want to make public. Instead of having a Gmail address in your PayPal, you can surely add one more email address that represents your brand. You can create [email protected] and use it in PayPal.
Don’t worry, PayPal will allow you to add more email addresses. They allow a total of 8 email addresses. So, you can surely add the official one.
How to use Standard PayPal checkout?
The above-given method was for the individuals who are trying to sell something using WooCommerce. If you are a registered brand, you can surely use the standard payment method.
For this, you will need a PayPal business account.
Setting up PayPal Business Account
If you are new to PayPal, you can simply create your account and then select the business option. You will be asked for further details about the business, you can enter all of them and you are all set.
However, if you already have an account at PayPal, you can easily convert it to a business account with few clicks. It hardly takes few minutes to do it.
Go to Settings and then you can click on “Upgrade to Business account”. You will be asked a couple of details about your business like what your business does and similar things.
You might also have to confirm it with the details by giving the documents. This depends on the type of the country as well as it depends on the place you live in.
Once you complete the setup, you can head over to the next part.
Choosing a plugin
When you want to set up your PayPal business account with WooCommerce, you will have to use a plugin. There are various plugins from which you can choose one. You should choose the plugin that goes as per your requirements.
We know it becomes a lot harder to choose from a huge list of plugins. So, we have collected some of the most popular plugins you can use.
- WooCommerce PayPal Powered by Braintree Payment Gateway
- WooCommerce PayPal Checkout Payment Gateway
These are the two ultimate payment gateways that will make your journey a lot easier. In simpler words, it’s easier to set up these plugins as compared to others.
Both of these plugins have different ways you can set up and use their accounts. Before we get into the plugin, we will see some of the basic terms that will be used here. With this, you will get a better idea of how you can set up the account.
Some Common Terms
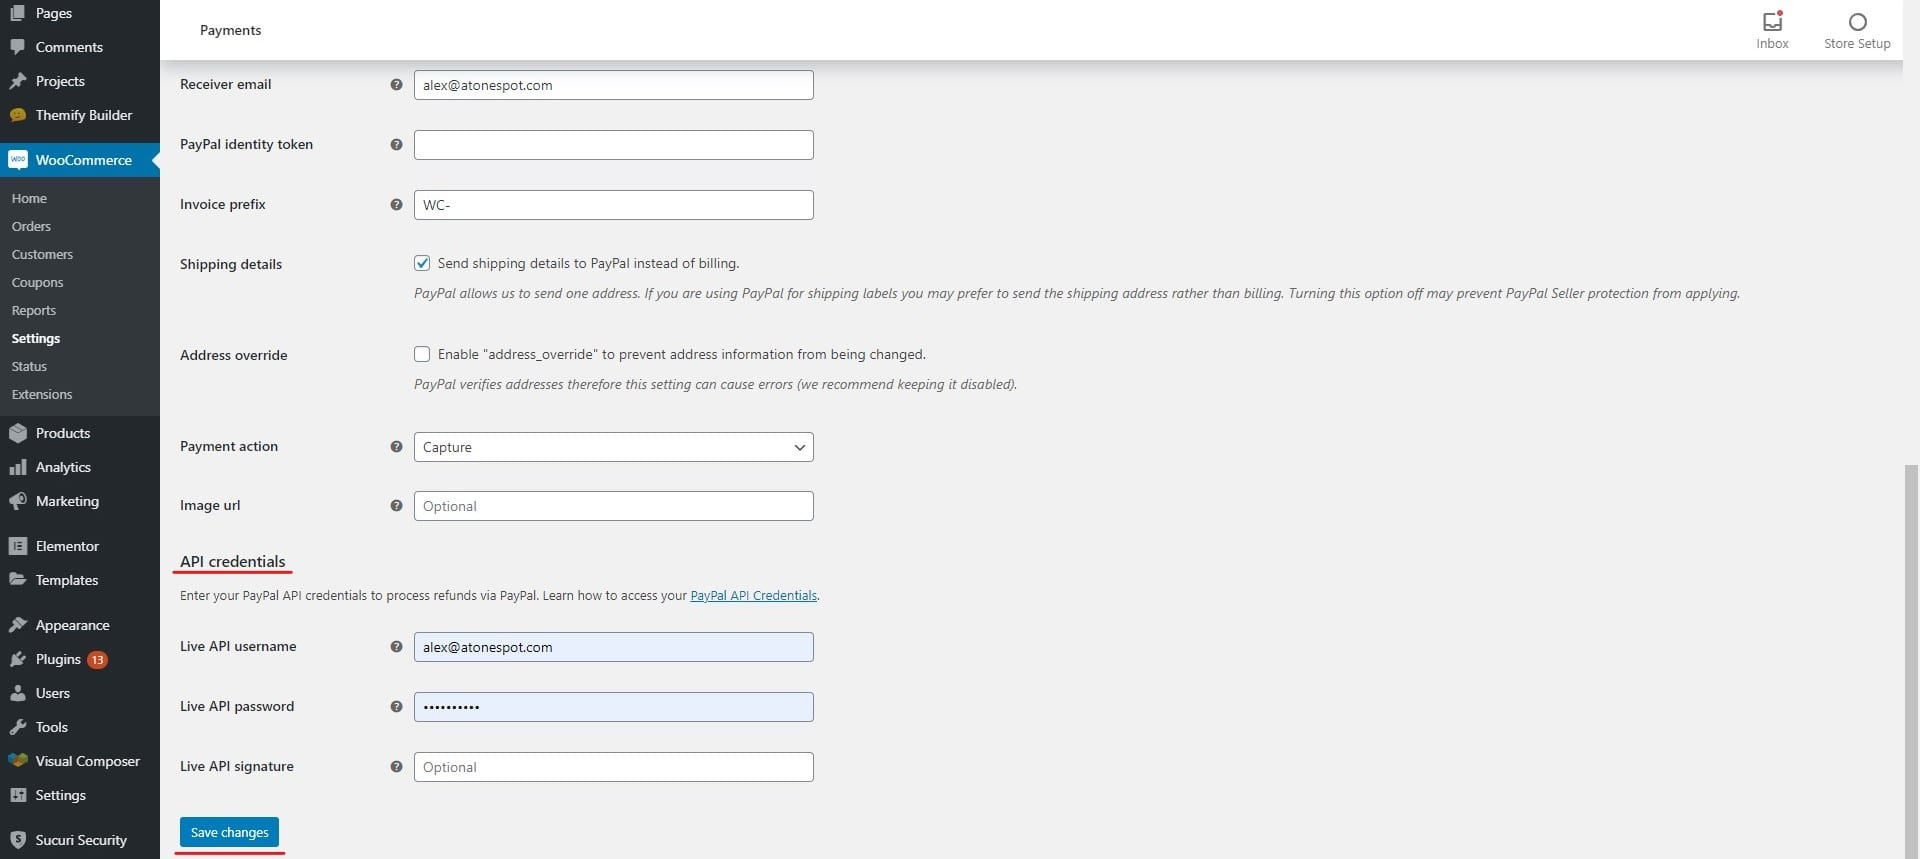
API and Secret: These are the two things you will need while you are setting up the account. API will allow PayPal to communicate with your account. In simpler words, when someone makes the payment, you will get it in your account. The secret is like the password you will have to set.
Sandbox account: One of the most common terms you will find here is the sandbox account. This is the name of the mode where you can test the payments. When you enter the sandbox API and secret key, you will see PayPal as your payment gateway. However, when you make the payment, it will automatically go through. This is to test whether PayPal is working correctly or not. You don’t need to enter any card details and neither you will receive the payment. However, if it goes through, it means the PayPal payment is working correctly. You can then focus on other things.
Setting up the Payments
This is the basic procedure that you will have to follow in all the plugins. No matter which plugin you are using, the method will be similar. Please note that the methods won’t exactly be the same but they will be very similar to each other. So, if you understand done gateway perfectly, you can easily set up any of them.
To set up, you will have to first head over to WooCommerce > Settings > Payments.
You can also head over to the respective plugin option. Right next to it, you will see the option to set up the payment.
When you click on it, there will be three main things you will have to. First is the PayPal configuration where you need to enter the basic details such as business name, etc. The next is API details which you will get from PayPal.
Whenever any plugin asks for the API, you will see a link right below it. When you click on the link, it will either give you the API details directly or it will take you to the tutorial from which you can get the API details.
Once you get the details, you can enter the details and then hit the save button, it will save the data.
If you want, you can also test the payments by using a sandbox account. The sandbox account will allow you to make the payment without any card. You can get the sandbox details from your PayPal account.
Advanced Options
Now comes the advanced options, you can always set up some of the more advanced options which will help you in many different ways.
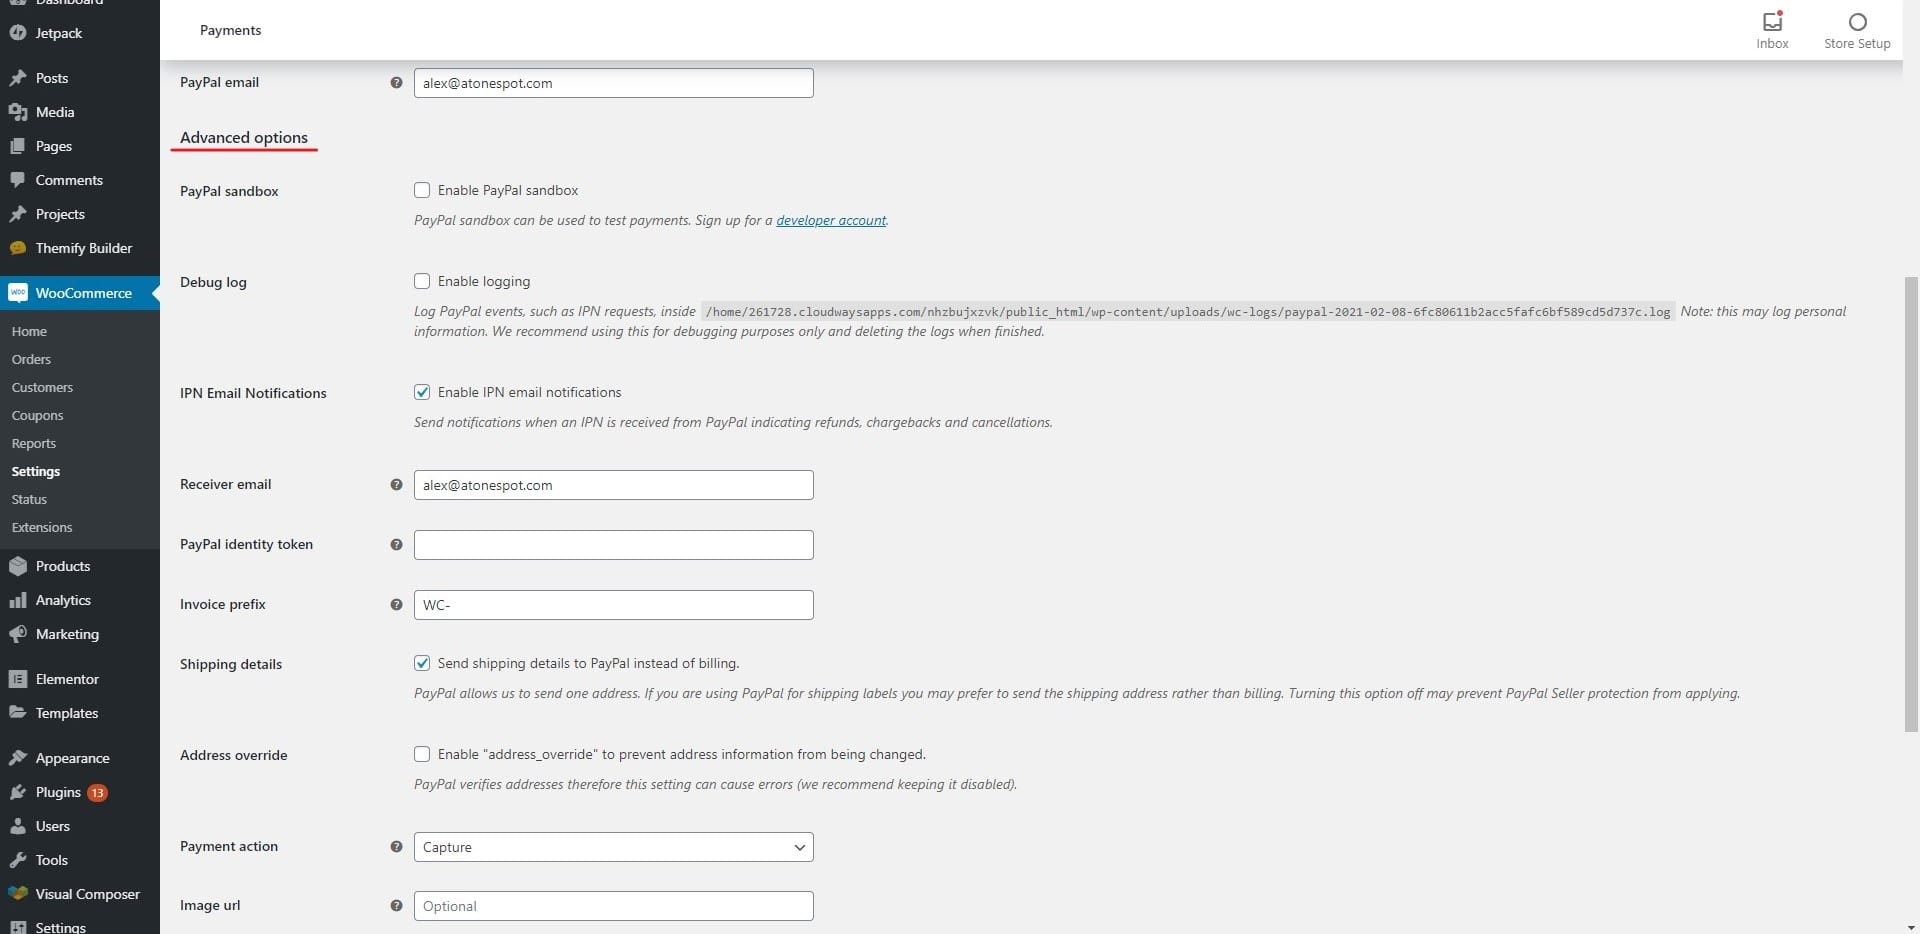
The advanced options include things like invoice details, debugging, etc.
When the customer will pay you money, it will as you for the details. An invoice is generated by PayPal. If not, this will be the same that shows on the user’s credit card transaction.
So, you can surely check the details and enter them as per your business. It’s highly recommended that you check all the details and enter them to get the best results. This will increase your brand presence. Therefore, it’s highly recommended that you enter all the things in the advanced options too.
The last one is where you can enable the debugging options. When you enable debugging, you will see the error message directly on the website. If for some reason, your payment is not going through, you can enable this. This will show you the error and you will be able to solve it directly.
Some plugins show them in debugging log as well. In that case, you will have to open your plugin page and you will see the log there. This is an easy way to get things going.
Which Method is for you?
We saw two methods here. Now, many people might be thinking about which method is for them. We will divide it into two easy steps. If you have to sell things directly as an individual, you can easily use the basic PayPal here. The default PayPal allows you to receive payments using PayPal. This is the easiest way using which you can receive the money in your account. Here, the payment methods get a bit complicated for the customers who are not using PayPal. Therefore, they might face some issues here. In some cases, they will also need to sign in with their PayPal account if they want to send the payment. That’s not the case with the standard checkout.
Therefore, if you are a registered business, we suggest you use the standard method. The standard method makes it extremely easier for the customers to make the payment. Customers can make the payment using their credit cards too. This is the easiest way they can pay you. They don’t even need to have a PayPal account. Therefore, if you are a business, you should surely use the standard checkout method to accept the payments. This will be perfect for you.
Final Words
To conclude, this is how you can easily set up PayPal payments on your WooCommerce website. PayPal may ask you for verification. You will have to provide the documents in that case. Once you give it to them, they will activate your account and you are all set to accept the payments.


