

Do you want to set up an Elementor Megamenu on your WordPress website? You have landed at the right place. Here we will see the exact tutorial on how you can do it in the easiest way possible. We will be using a third-party plugin in order to do so. It is one of the easiest ways you can use to set up Elementor Megamenu and start using it.
For the people who do not know, a mega menu is a menu that consists of multiple columns. You might have seen many examples on live websites where you click on a menu item and it opens a whole new menu with multiple columns and each column will have different links. We are going to do the same.
Getting started with Elementor Megamenu
We will need to setup Elementor and the corresponding plugins. In order to begin our tutorial, the aforementioned page builder plugin Elementor and the analogous plugins must be installed on your WordPress website.
So, let us commence with the setup.
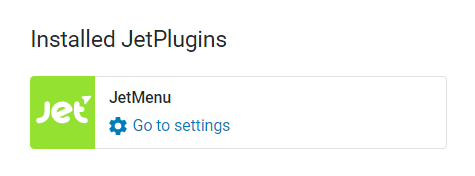
Firstly, we will need Elementor. Secondly, we will also need JetMenu. It is a menu plugin that works perfectly well with Elementor. We will have to download and install it. Keep in mind that it is a paid tool. The paid tool gives us the ability to access more features within the plugin. Do not worry, it will not cost you a lot to use this plugin and the additional features are well worth the price.
Now, we will also need the pro version of Elementor in order to create the header of the website. If you want to customize the menu in Elementor, you will need the header builder. It is a part of the theme builder feature that is only available in the pro version.
Now that we have setup our WordPress website with the necessary plugins, we are ready to continue with our step-by-step guide.
Creating an Elementor megamenu
The first thing that we need to do is create a menu. We can create a menu in the same way as we do in WordPress.
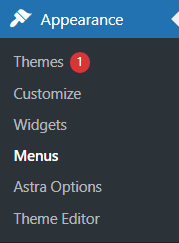
Head over to Appearance > Menu. Afterward, just click on the “Create menu” button. This is how simple it is to create a menu.
There are numerous options that we can interact with. In the sidebar, you will see the JetMenu plugin. Do not forget to activate it after the installation. When you enable the JetMenu, you can easily access all the features therein.
We can adjust various options here for the menu. For instance, you will be asked to select a location, select a layout, and, in a similar manner, to select many other things in the JetMenu.
Once you have gotten familiar with the options, we are ready to continue.
We will then have to add the main menu items. This is the core menu that users see without hovering or clicking in the menu. For instance, if you want to add a menu element called “Services” to the navigation bar, you can add the element easily to the core menu.
The next step will be to configure the menu and start editing it in the way you want.
Configuring the Menu
The menu is easily configurable. You can access various options in the menu.
When you click on a menu item, you can edit the elements within how you want. When you click on the menu item, a JetMenu editing button appears. Now we can see the different options available to us for editing. We will take a look at all the options one by one and see how we can manipulate with the settings in order to give our menu the best look.
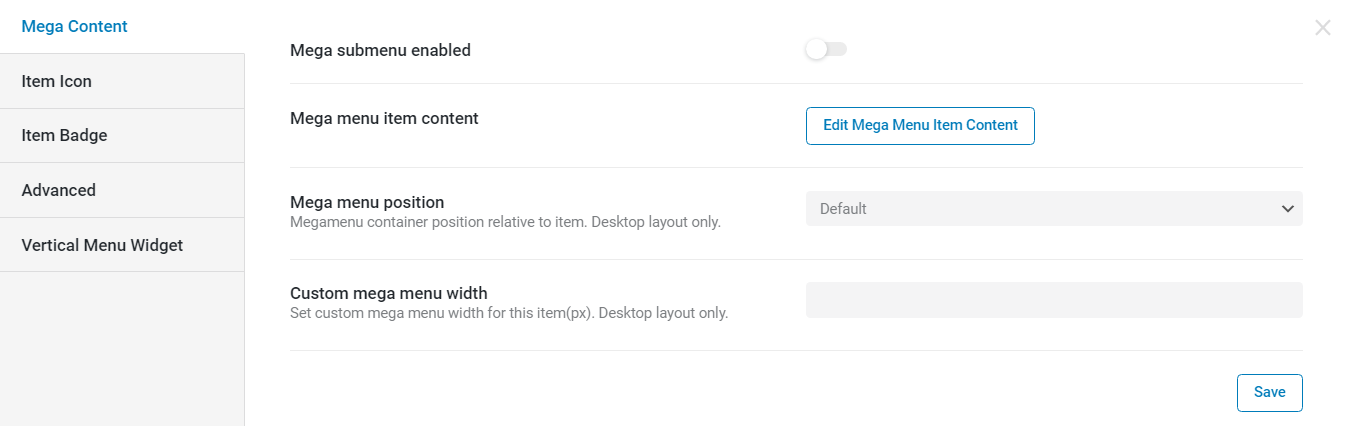
Now we can enable the submenu. This will be the first option that you will see in the popup configuration bar.
There we can see a few more options available to us, for instance, we can select the content and also set the position of the MegaMenu. We will first select and create the content for the menu. Afterwards, we will go over all other elements in the configuration bar. So, right now, we do not need to worry about other features and we should just focus on adding the content. You can simply click on edit MegaMenu content and then follow the next step.
Adding the Content
Once you have added the menu items, you will be directed to the Elementor page where you can make the changes.
On the Elementor page, you can make all the necessary adjustments as you see fit. If you have worked with Elementor before, then you are aware of how accessible it is for the average user and the multitude of opportunities it presents.
This is where you can add the columns to your menu and adjust them in the way you want.
Now, if you want to add icons in the Elementor Megamenu, you can just add them under the Item Icon section. You can select the type of icon you want, design of the icon, colour and size.
If you want to have a 3 column Elementor Megamenu, then you can add three columns within Elementor. In the same way, if you want to have an icon beside it, you can also do the same thing in there.
Please note that the Elementor page you are editing is just for the menu items. So, you need to keep this in mind while you are making the edits.
However, it is worth keeping in mind that you can only make changes to a particular item. Also, you will not see all the items as you did on the normal page. Sometimes, a page that looks good in Elementor might not look as good in the menu. It is a good thing to be aware of during the design process.
This is how you can create the menu. Once you have created the menu, you can do the same thing for all the items. You can create the sections one by one. Now we have seen some of the features that are accessible to MegaMenu users.
Creating the Header
We have just created the menu. Let us take a look at how you can create and customize the header using Elementor.
As we are using Elementor Megamenu¸ the same menu that we defined in WordPress will appear in Elementor. Though, you will need to access the theme builder. This tutorial only showcases the aspects worth noting within the theme builder feature. Let us see what options are available to us.
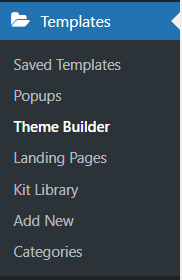
We can head over to Templates section and we will see the Theme Builder option. You can click on it and then select the Header option from the list.
When you click on the header menu, it will open the header layout. There are two options that you can select. One of them allows us to directly import a template within. You can import the header template and then start using it.
The templates are fully customizable and many free different designs are available to us for use. You can also make all the changes you want to the templates. There are no restrictions in the template.
Once you have done this, you can also make the changes to the mobile version and optimise the header for it.
Adding the Mobile Layout
Elementor allows you to add a different menu for the mobile too. You can add the mobile layout for the page. If you have used Elementor before, then you might know that Elementor allows you to add the mobile layout too.
There will be a mobile option in the left bottom menu from which you can make the changes. Changing the website layout for different devices is an important part of website design process. Now, when you click on it, you will be allowed to make the changes on the website for the mobile view.
The headers are always different for mobile and desktop. You can have the mobile header here. It is a very important step that you should not ignore. Many people have the habit of keeping the same header for different screen sizes. You should never do that as your design will always be lacking therein.
Once you have made all these things, you can proceed with the next step.
The next step will be all about adding a menu to the header. Till now, we have made the menu and created a beautiful header for our website. What we have not done yet is added the menu in the header. In the next step we will add the menu to the header.
![]()
Adding Menu to Header
Now we will add the menu to the header. It can be done by heading over to the widget panel in Elementor.
Here, you will have to select JetMenu widget from the panel. When you add the JetMenu widget, you can then select the menu that you have just created. So, just add the menu elements, and then you are all set to go.
Once you have done all these things, you are almost done with the header creation part.
You can add the extra elements of the header such as search icon, cart icon, etc. if you are using WooCommerce or any other similar plugin. This is where you can have some fun and add other elements to your header.
Using Z-index
If you want the elements to overlap each other, then you can always use the Z-index. This is a mistake that most people make. You need to understand that you have to enter the Z-index on the section and not on the column.
You can start with 9999 and then decrease it or increase it as you wish. When you test the website, you will get a complete idea of how it works and what features are available through the use of the Z-index. So, it is great to try out the Z-index.
Using Other Plugins
We hope that you now have a general idea of how to use MegaMenu in Elementor and the features it entails. However, you might not love the plugin that we have just discussed. Some people might want more features available to them or use a different plugin altogether.
If you are one among them, you do not need to worry about anything. Let us take a quick look at another plugin we can use instead of the JetMenu which can be used for Elementor megamenu.
The plugin that we are going to discuss is Max Mega Menu. In essence, it allows you to do the same thing. The general step-by-step guide would be basically similar to one we just discussed. The biggest difference would be the way we add the menu to the header.
When you add the menu in the header, you will have to look for the Max Mega Menu widget that is available in the widget panel. Once you have found it, you can add it in the section, and you are done.
If you are confused about which plugin you should use, you can check out the official website of both plugins. Once you check out the official website of both the plugins, you will get a general idea of the UI and the features they possess. The pricing can also be seen here.
Please note that it does not matter which plugin you use, you will still need to have the pro version of Elementor. There is no way to do it without Elementor pro. So, you will have to get the Elementor pro.
Final Words
In conclusion, as we can see, in order to use the Elementor MegaMenu one does not have be a tech wizard. It is easy to add new columns to your menu items and manipulate with the data they encompass. By adding an accessible menu, we can increase the usage of our website and the accessibility of the features within. Be sure to use the right widget when building header with the Elementor Theme Builder. You can head over to the official websites and see the features to know more.


