

To improve your security, you can use Google Authenticator for your WordPress website. You can easily get started with the tool. So How to Set Up Google Authenticator? With the Google Authenticator, you can easily have two-factor authentication at every stage. SO, whenever any of the admins want to log in to the WordPress website, they will require an OTP. All these are done using Google Authenticator. This will surely increase the security of your website as you are putting two factors here. If someone wants to hack any of the accounts, they will have to pass two stages here. Only then, they will get admission to the website. Therefore, you can be sure that your website is secure.
Overview of Google Authenticator for WordPress
Here, you won’t get the password in your email or on your mobile phone as an SMS. Instead, you will get the OTP using the app. The app is Google authenticator. Therefore, you will have to install the app on your mobile phone first.
It’s available on almost all possible devices. Therefore, you can surely start using it on any device you want. Further, there are some of the things that you need to keep in mind here. if you don’t have device access, you will have to log in using the relevant account, and then you will get the rest of the details.
For the solution, they allow you to have the default numbers. Here, you will have some of the default passwords that you can use for specific email addresses and numbers. Therefore, you can surely bypass it if you want. However, it won’t be easy for the target person to bypasses it.
Other than this, you will need to install a plugin to the WordPress website too. Like you might have guessed, you will need to add some of the functionalities here. If you don’t have the functionalities in your WordPress website, you won’t get the OTP. Therefore, you will have to use the plugin.
We will surely see how you can set up the plugin.
Before that, make sure that you have logged in to your Google authenticator app. If you don’t know how to do it, you will have to just click on Sign in and then log in with your Google account. In this easy way, you can log in to the account and start getting all the codes in the app.
Once you set it up, you can then proceed for using Google Authenticator for WordPress.
Google Authenticator Plugin
Like we have already mentioned, you will need a plugin too. The plugin we are going to use here is Google authenticator.
There are two plugins that you can use here. One of them is Google authenticator which is popular. The second one that is mostly preferred by the advanced users is also named miniOrange’s Google Authenticator — WordPress Two Factor Authentication. It’s by MiniOrange. You can surely use this plugin if you want.
We will see the setup and configuration of both of these plugins as we move further.
The point is which one should you choose?
Well, if you are a beginner, you can simply choose the first one that we mentioned. The plugin we are talking about here is by Ivan Kruchkoff. You can easily get this in the WordPress directory. This will simply create a second page in the login screen where you will have to enter the Google authenticator code. Therefore, if you are looking for an easy plugin that will do the work for you, you can surely start using Google authenticator for WordPress.
However, there are many people out there who might be wanting more things. If you are among those who want to get advanced features, you can surely go with the MiniOrgange plugin. Further, if you already are using any of the Mini orange plugins, we recommend you to go with the Mini orange plugin here. As this will be easily connected and you will get the best features.
Also, if you are looking to use the plugin for WooCommmerce plugin, you can surely use the MiniOrange plugin. The MiniOrange plugin works with all the WooCommece websites and has many features you can use.
Now that you know which feature you should choose, we will move further.
Installing the Plugin
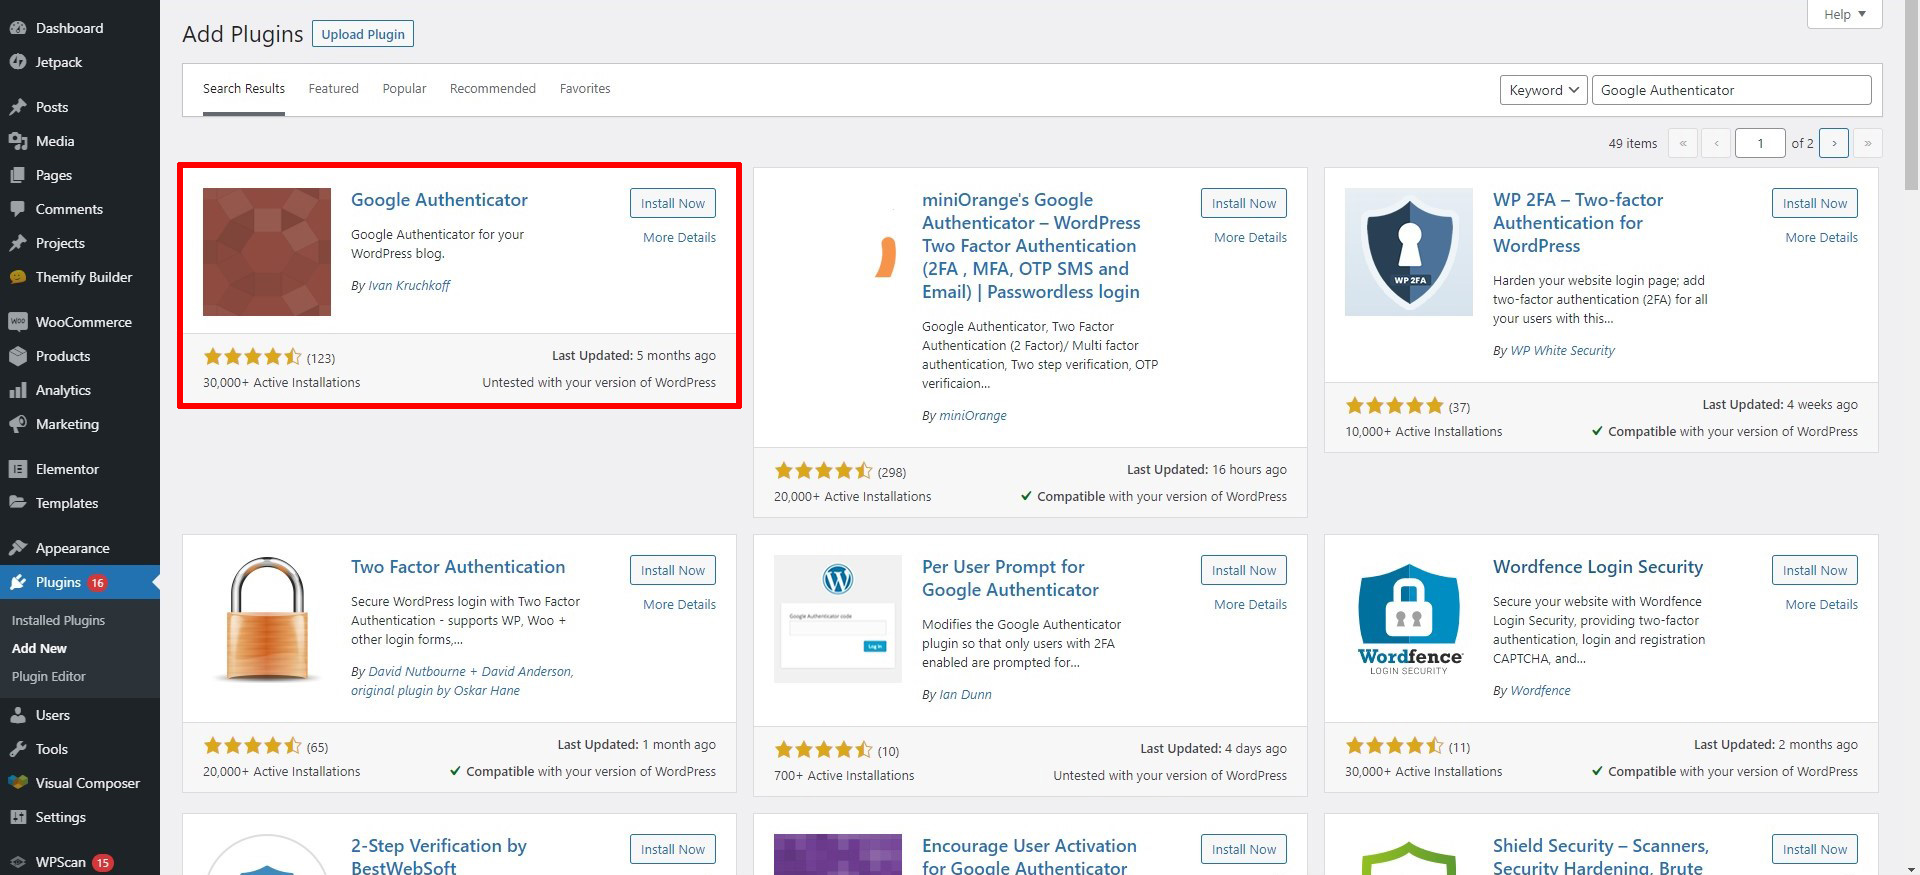
You surely might be thinking about how you can install the Google Authenticator plugin for WordPress, right? We will see how you can install it. For that, we will be using the default WordPress directory. The plugin directory has all the plugins. You can easily choose from any plugin.
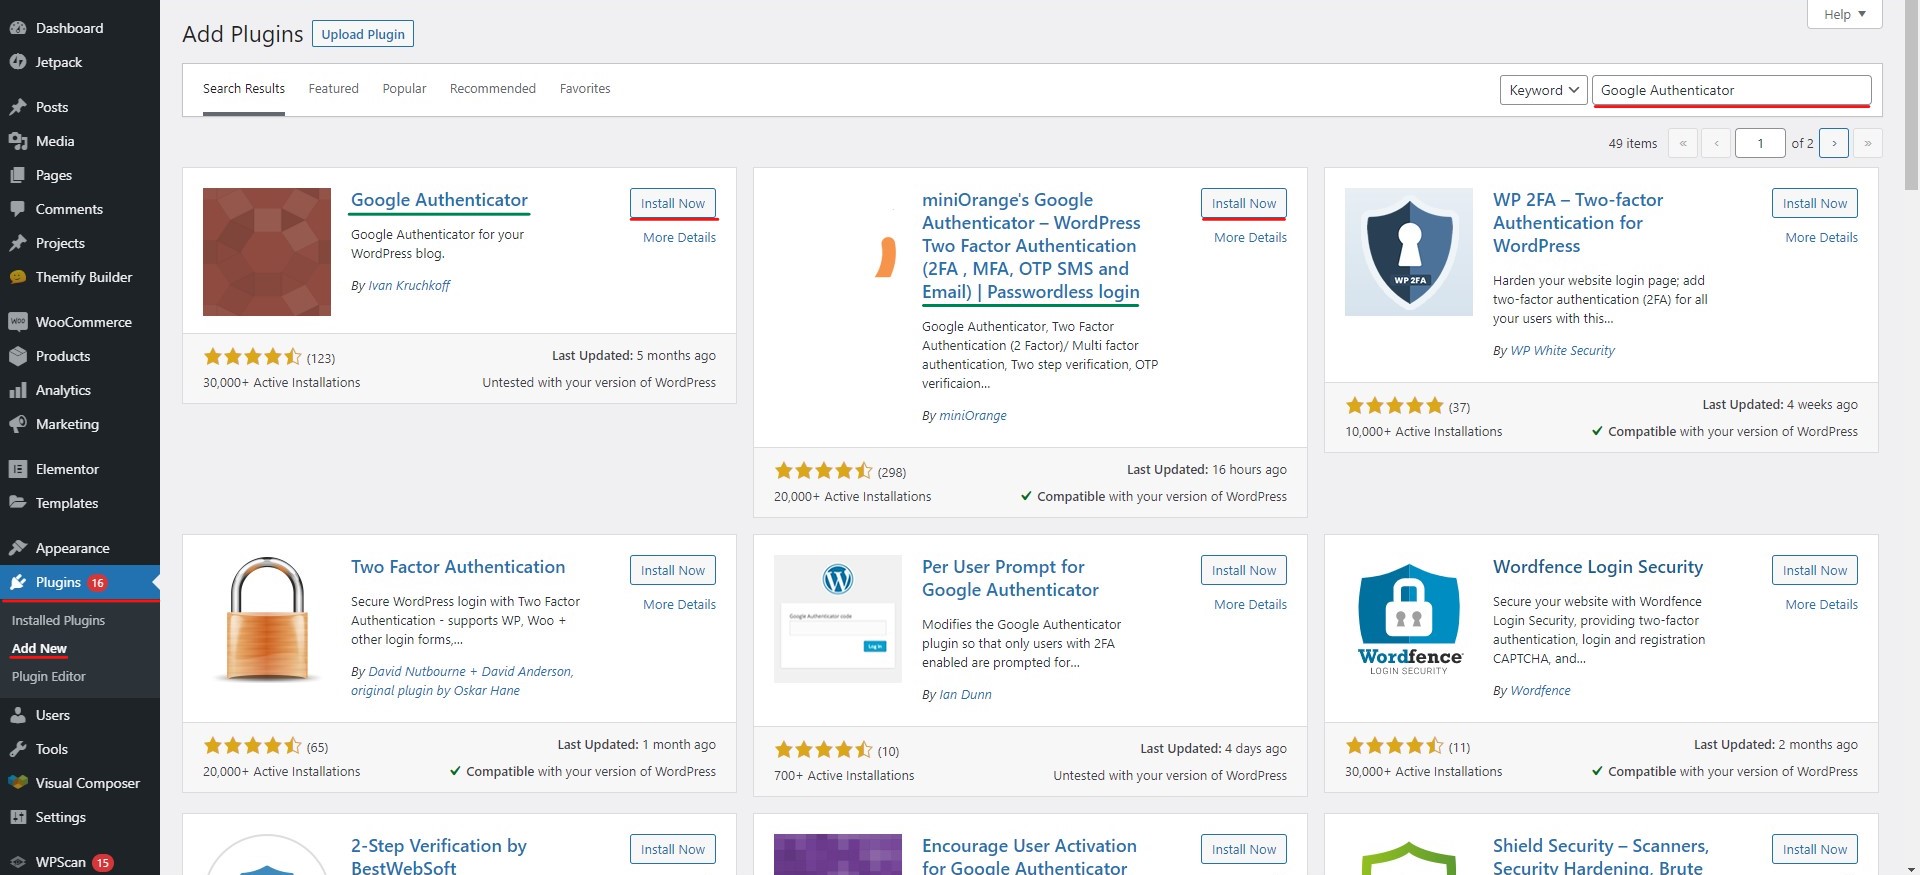
It doesn’t matter which of the given plugin you want to install, you can install it directly from the plugin directory itself. Therefore, you can simply follow the steps and you will have the plugin installed on your system. You won’t have to worry about anything as we have made sure that you get the exact steps for the same.
To install the plugin, you will have to head over to the Plugins options in the menu. When you come to the plugins option, you will have to click on the Add new plugin. The add new plugin option has a complete list of the plugins.
You can use the search feature here. Just search for Google Authenticator for WordPress and you will find both the plugins that we are talking about. You can install any of the plugins that you want here. Both of the plugins are great and you will find them in the plugin directory.
Therefore, you can install any of these as per your wish. All you have to do is just hit the Install button and you will get the plugin installed on your website. Further, you will have to hit the Activate button. This is how you will activate the plugin.
Please note that it’s important to activate the plugin if you want to use it. Also, don’t activate both of the plugins at the same time. This might cause some of the issues that might harm your website. Therefore, you only have to activate one of them.
Using Google Authenticator by Ivan Kruchkoff
It’s quite easy to use this plugin. All you need to do is activate the plugin if you haven’t already activated it. Once you activate it, the plugin will only be visible on the profiles page.
Therefore, you will have to open the profile page. For that, you will have to go to All users > Your Profile. In the profile section, you will see the option to activate the plugin. You can simply activate the plugin from there.

You will see that there is an option called “Create new secret”. Click on it and it will show you the steps on the screen to create a new secret. It will automatically come into the field. It will also display a QR which you can scan in the Google Authenticator app for WordPress. When you do it, you can then be displayed the two-level security.
This is how you can set up the plugin.
Each of the users has different settings here. Therefore, if you want to activate it for all the other users, you will have to do it manually. There is no way to activate it for all the users. Therefore, people often choose other plugins if they want to do it for all the users too.
This is especially for the people who want to have 2FA for the admin only. If you are the only admin or if you have 2/3 admins who want to have double security, you can use this plugin where you will be asked to verify your identity by giving out the code from the app. In this way, you can be secure and no one can easily hack into your account.
You can surely create a new secret if you want. The settings for each user are different.
The Problem with the App
Now, as you might have guessed, the app is very limited and doesn’t provide more facilities. It’s the perfect app for people who are looking to have a 2FA for the admin panel. However, if you want it for all the users, you might want to look for other plugins that can do the same work.
The next plugin that we are going to see will do a similar job but it has a lot of complex things that you need to keep in mind. Therefore, if you are a beginner, you might want to hire a person to do this for you.
Using Mini Orange Plugin
If you want to use Google authentication or 2FA for all the users too, you can use the Mini orange plugin. Please note that the name of the app is Google Authentication only. Mini Orange is the name of the developer. Therefore, you can install that plugin too.
Let’s say, for example, you run a WordPress website with a WooCommerce store. Now, if you want all the customers to enter the 2FA to log in to the account, it would be impossible to do it with the previous plugin, right?
For that, you will need an alternative that you can use. Here is the alternative that you can use. You can use the best plugin that is available in the plugin directory that supports all the users. You can use the Mini Orange plugin in that case. The Mini Orange plugin will allow you to have complete access to all the things. You can allow all the users to have the 2FA when they want to log in to the account. This is an easy way that you can use here.
Now, if you surely might be wondering how you can set up the Mini Orange plugin, right?
Let’s talk about that.
Setting up Mini Orange
If you want to set up Mini Orange, you will first have to install the plugin and activated the account. When you activate the account, you have taken the first step. This is the most important and the first step that you need to take.
You will be asked to create an account at Mini Orange as soon as you activate the plugin. Therefore, you don’t need to visit the website and then create an account. Instead, you can stay on the WordPress website and wait for the popup to come.
Once you create an account, you will see various options you can use for authentication. All these options are available that you can use. Unlike the previous plugin, here you don’t even need to install the Google Authenticator app if you don’t want to use it.
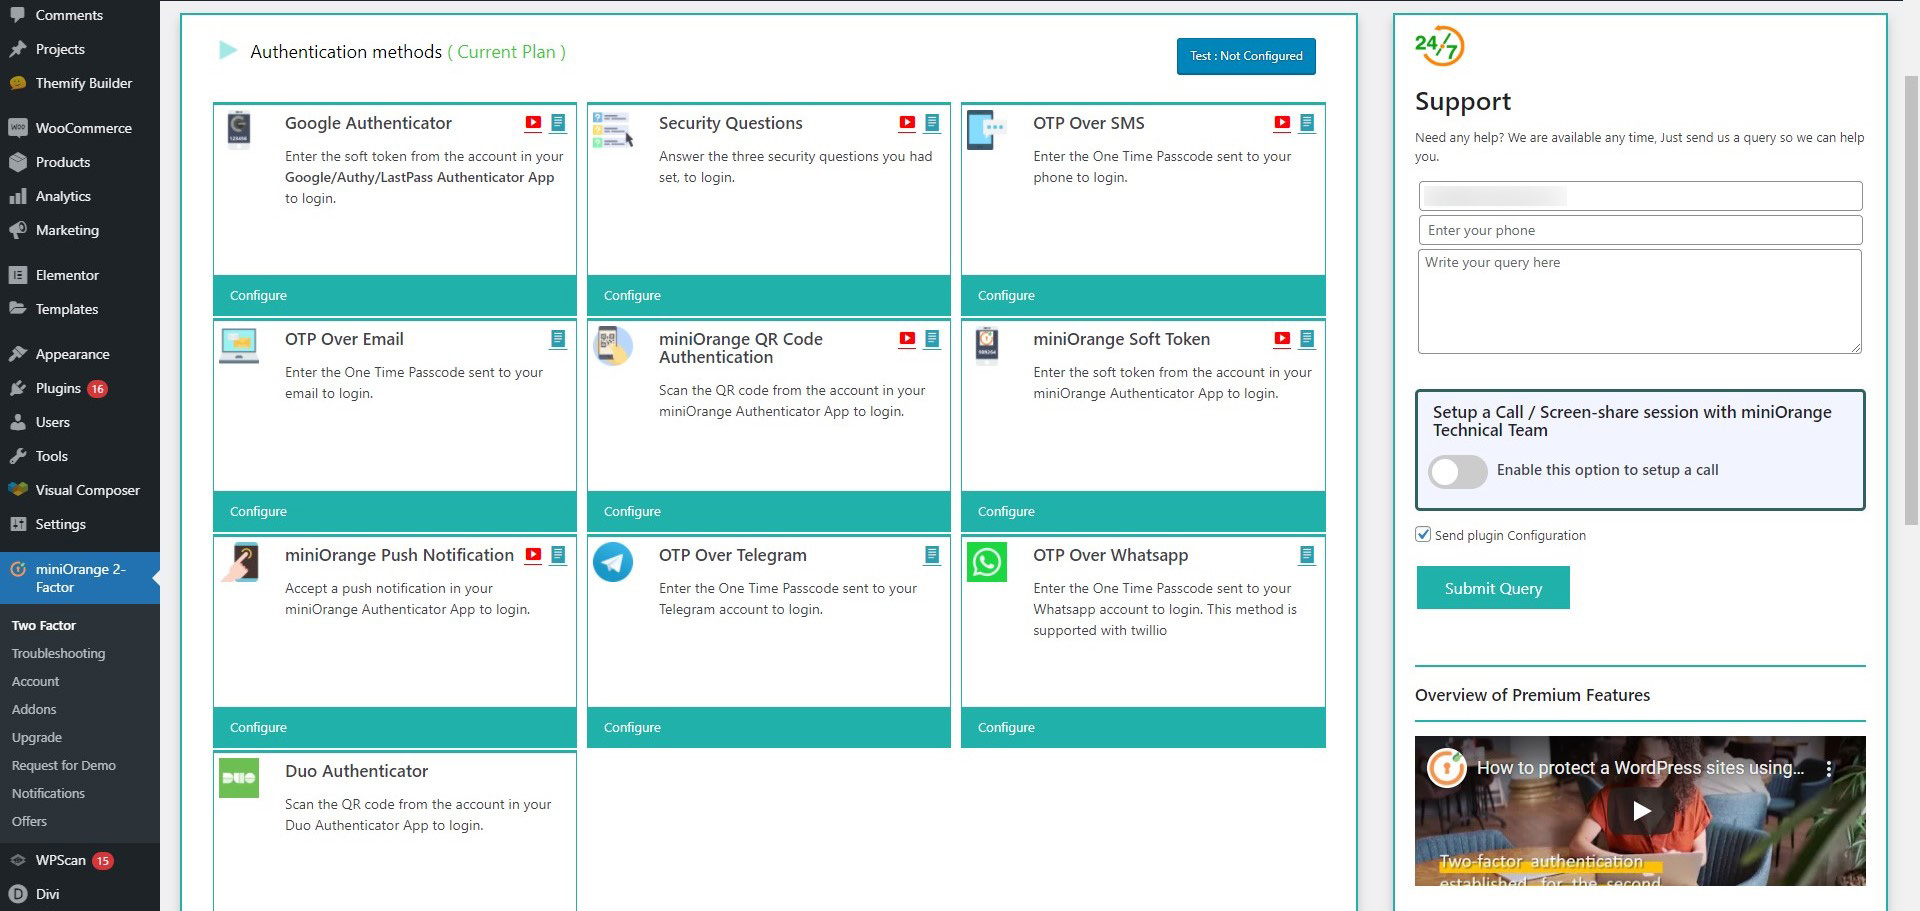
You can use the OTP which will be sent to your registered email address or SMS. It uses Mini Orange’s API.
Therefore, if you want more features, you will have to pay them the charges. It will cost you some money if you want all the features. It’s not a completely paid tool. There are some of the features that are available for free whereas some of the features are paid. You can choose the one that you love depending on the same thing.
There is a complete list available where you will see the list of the features that are free and the same goes for the paid. You can then choose whether you need the paid features or you want to keep using the free version that is enough for you. You can choose the one that you love and then continue.
Final Words – Google Authenticator for WordPress
To conclude, this was all about the best plugins you can use for Google Authenticator for WordPress. We have discussed possible solutions that you can use here. Further, we have also seen how you can set up the plugins. You can surely explore the plugin on your own to know more about it. There are many options that we have not discussed here but are there on the app. You can check them out.


