

When you are uploading an image or any file in WordPress, you might come across a 413 error. It says the request entity too large and doesn’t allow you to upl0aod the file.
There are easy ways to fix the 413 request entity too large error in WordPress. This post will cover all the ways you can use it to fix it.
Overview of 413 Request Entity Too Large Error

This is a common error that you might come across. Usually, this occurs when you are uploading a media or any file to your WordPress website. Every hosting provider as well as the CMS has some default limit set for you. You won’t be able to upload a file larger than that memory.
However, most of the hosting services allow you to change it. The same goes for WordPress too. You can change the default limit and increase it. We will see some of the popular methods o fix the 413 request entity too large error.
Some of the affordable hostings don’t allow you to change it. For that, we will see another solution to upload the file without any issues. In simpler words, you will get a solution to all your problems after completing this article. So, don’t worry about the problem. S
Fix 413 Request Entity too Large Error
There are some of the ways you can use to fix this error. Before you make any changes to the coding, make sure you have taken a proper backup of your website. In this way, even if something doesn’t go right, you can roll back the changes directly. This is the precaution you need to take at every place.
Let’s get started
Change the PHP Version
You can change the PHP version in your cPanel which will fix the issue. In most hosting, the PHP version will be outdated. The outdated PHP version uses fewer memories and allocates less memory on the website.
To fix it, all you can do is change the PHP version with ease. Changing the PHP version is an easy job. All you have to do is open your cPanel and find the option of the PHP version.
Again, you have two options here. You can either change the entire PHP version to the latest one. Alternatively, you can change the PHP options. When you click on “Select PHP version”, you will see a link called “Switch to PHP Options”. Select it and it will show you various options that you can change.
You need to increase the limit of these three options.
- upload_max_size
- post_max_size
- max_execution_time
Change it to 64M.
Change Limit from WordPress Side
There is surely not a single way to change something. You can either change all three limits from the PHP version. Alternatively, you can also change it from the WordPress site.
Of course, you can also change it from the WordPress dashboard directly and you can surely change it from the file manager too.
You need to open the most important WordPress file of your theme that is functions.php. All the data will be stored inside it.
If you are in field manager, head over to wp-content/themes/yourtheme. If you are in the WordPress dashboard, head over to Appearance > Editor. You will see the functions.php in there. It will give you some earning that says it might crash your website. You can hit continue and carry on.
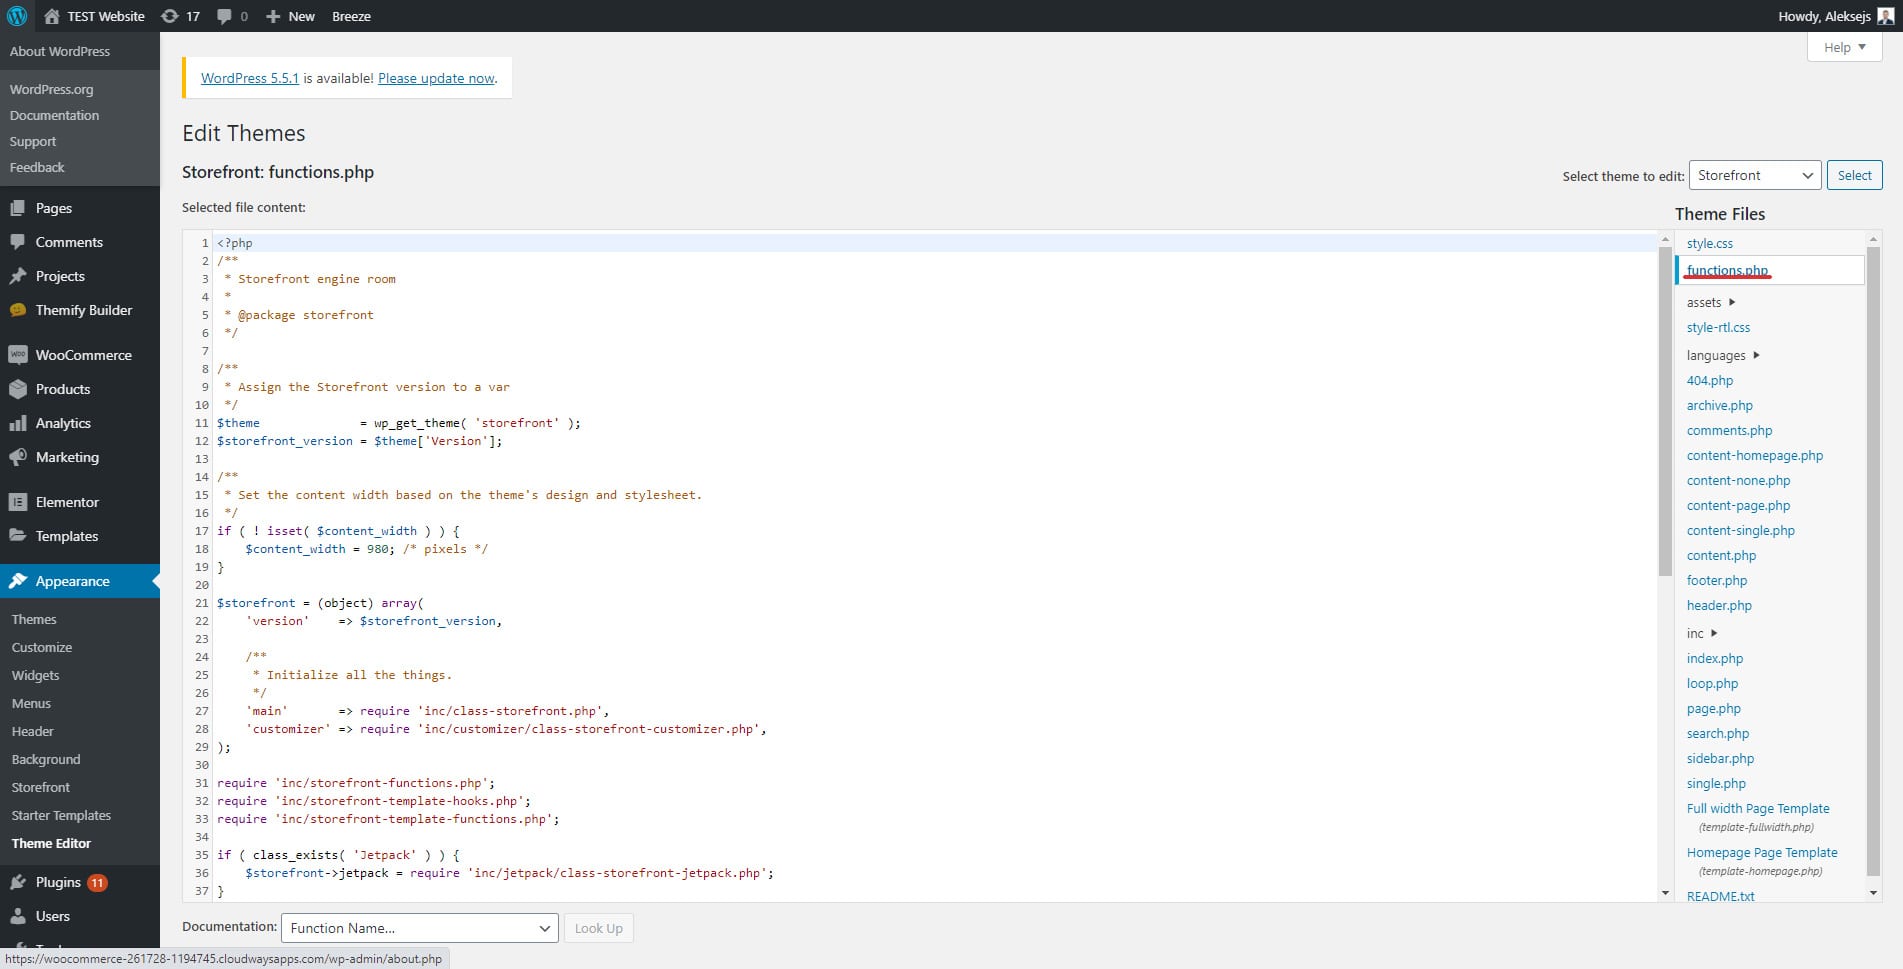
Just add the following lines below it.
@ini_set( 'upload_max_size' , '64M' );
@ini_set( 'post_max_size', '64M');
@ini_set( 'max_execution_time', '300' );
Now, you are almost done. Click the save changes and that’s it.
Make sure you have created the child theme or you can do it in the site-specific plugin. Whenever you update the theme, this code might vanish. So, you need to make sure that you have created a child theme. This will save the data and your website won’t face an error.
This option might not be feasible for all people. As some of us are working with the clients and it is not possible to change the theme file directly. So, you need to make the changes in such a way that it doesn’t vanish tomorrow. That’s where the .htaccess file comes into the picture.
Changing the Limit via .htaccess
Most of you working with WordPress might be aware of the .htaccess file available. You can make a lot of changes using it. It allows you to change the memory allocation too.
To locate it, you will have to head over to the file manager. You will see the .htaccess file in the root directory itself. If you don’t find it there, it will be hidden. So, you need to enable the hidden files to make the changes.
You will see the settings icon in the top bar inside the file manager. Just click on the icon and you will see the option to display the hidden files too. Enable the hidden files and you are done. You will now see the hidden files too which will include the .htaccess file. If you can’t see it, you probably might be in the wrong direction.
Make sure you are in the root folder. If you see the public_html folder, click on it and you will find all the directory there. You can now click on the code edit button by right-clicking on the file. Again, make sure you have taken a proper backup of the file before you move on to make the changes. You can then add the following code once the file opens.
php_value upload_max_filesize 64M
php_value post_max_size 64M
php_value max_execution_time 300
php_value max_input_time 300
Add it to the bottom or you can also add it to the top. Don’t add in between as this might spoil the entire code. Once you make the changes, you can click on the save button, and you are done. You can now upload the files without having to worry about the 413 request entity too large error in WordPress. Give it a try.
What if Nothing Works?
Now, what if none of the above-given techniques work? We still have your back. We won’t solve the issue here but will tell you another way to upload the files.
You can upload the files directly via your file manager or FTP. It is easy and there is no limit when it comes to filing manager or FTP. One of the coolest things about upload files via FTP is that it will also check the files for the virus. There is a virus scanner that comes within cPanel. The cPanel virus scanner will scan for all the files before you make the final upload.
This makes it easy for anyone to upload the files. Uploading files via file manager of FTP is fast and secure. You can also upload multiple files there. This will save you time. For some people, it might take some time to understand the FTP but it is super easy to upload files via file manager.
Open the file manager option in your cPanel and you are all set to make the changes. This is something that you should do which will fix the 413 request entity too large error in WordPress.
If the file is too large, you can also create a zip file and upload the zip. The zip file takes less memory and you can even extract the file from it. Uploading a zip file will save some space and you will also have a quick backup for you.
Upgrade the Hosting
In some plans, there is a limit even in the file manager. So, in this case, you have got two options.
- Ask the hosting provider about the error
- Upgrade the hosting
Before you upgrade the plan, it is always a good decision to ask the hosting provider for the details. Once you get an answer to all your questions, you can make your decision.
You can always upgrade the hosting if the resource limits are reached. There is a limit to shared hosting. This doesn’t mean that you should upgrade to the VPS but you need to be sure that everything is in line. You can go with a higher shared hosting plan that provides better resources. This will help you with the errors and your performance of the website will also increase a lot.
Therefore, you can always consider upgrading the hosting but before you upgrade, make sure you ask your hosting provider about the details. If it’s a green light, you can upgrade the plan and get better resources.
Final Words
To conclude, these are some of the best ways to fic 413 request entity too large error in WordPress. Make sure you have a proper backup working. If you installed a plugin recently and you are facing this error, you can also try deactivating that plugin to see if it fixes the issue. However, this is a rare case scenario as this error is usually caused by the hosting and not by the plugin. However, you can surely give it a try.


