

WooCommerce has become a lot more popular tool as it provides one of the easiest and the most powerful ways to create an eCommerce store. If you want to convert your WordPress blog to an eCommerce store, you are in the right place. This is an article about the WooCommerce Setup tutorial. We will see step by step guide on how to set up WooCommerce on any WordPress website.
Preparation Before Installing WooCommerce
This is the pre-requisite step. You will need an active WordPress installation if you want to use WooCommerce. Most of you might already have WordPress installed. So, you can continue to the next step.
For completely new people, you will need a hosting account. Inside it, you will have to install WordPress.
It’s easy to install WordPress, here are the quick steps to follow.
- Open your cPanel or web panel
- Head over to a Softaculous installer. You will find it inside the cPanel
- Select WordPress from it
- Hit the install button
- You will then have to fill up some details such as your WordPress installation directory, admin username, password, etc. You can also select the database name and stuff like that.
- Once the installation is completed, you can log in and then continue with the WooCommerce.
WooCommerce Setup Tutorial
We will see the step by step guide on how to install WooCommerce. WooCommerce setup tutorial covers all the things you should know about WooCommerce. Staring from how to install WooCommerce to how to add the first product, we will see all the things you should know about it. We will also give some suggestions for improvement. So, stay tuned.
Installing and Activating WooCommerce
So, now that you have WordPress, you will have to install the WooCommerce plugin. For that, you will have to head over to Plugins > Add Plugins.
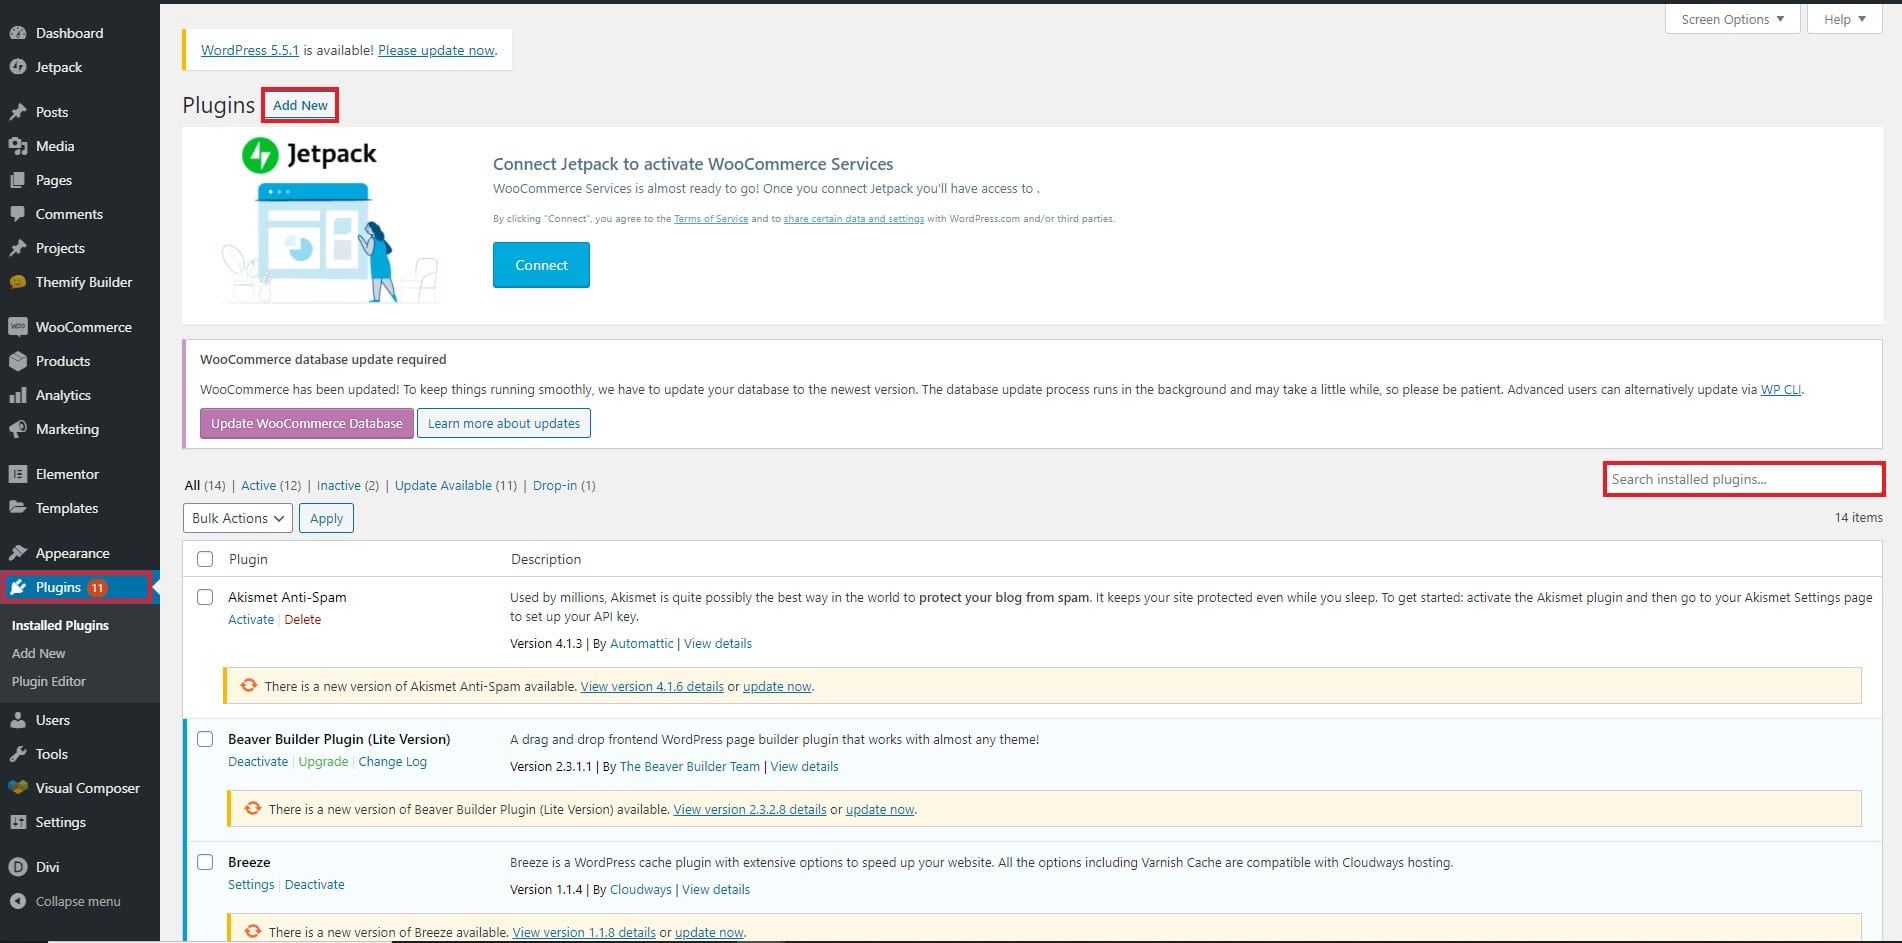
Search for WooCommerce and install the plugin. Thereafter, you can click on the “Activate” plugin. That’s it. The WooCommerce plugin will be activated.

You can also activate the plugin by downloading it from the WordPress directory and then uploading the Zip file in the “Add plugins” button.
Now, we will head over to the actual WooCommerce Setup tutorial.
The Setup Wizard
When you activate the plugin, it will take you to the setup page. You will see the Welcome to WooCommerce screen.
It will show you a form that consists of the following steps:
- Store Details
- Industry
- Product Types
- Business Details
- Theme

WooCommerce Store Details Setup
The first page of the setup wizard is the store information. On this page, you will have to fill up information regarding the store.
The information includes
- Address line 1
- Address line 2 (optional)
- Country / Region
- City
- Postal code
And an option if you set up a store for a client
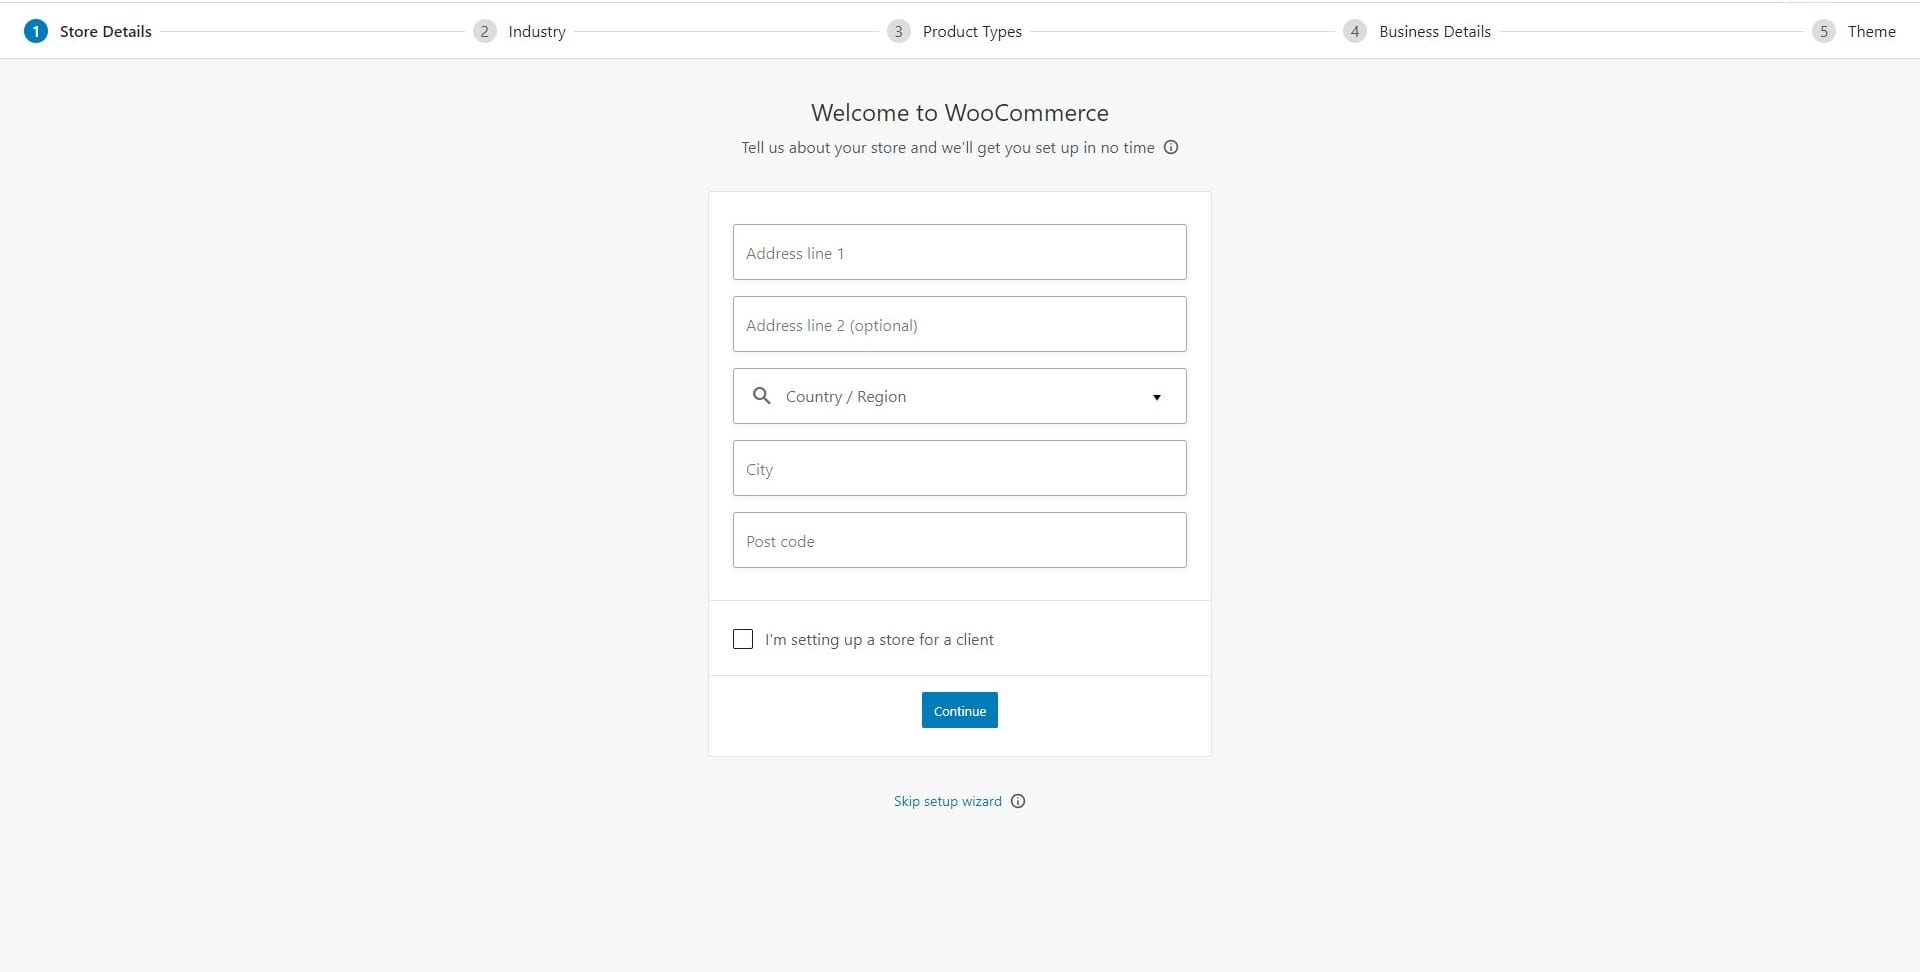
All the fields except checkbox and second address are mandatory to be filled.
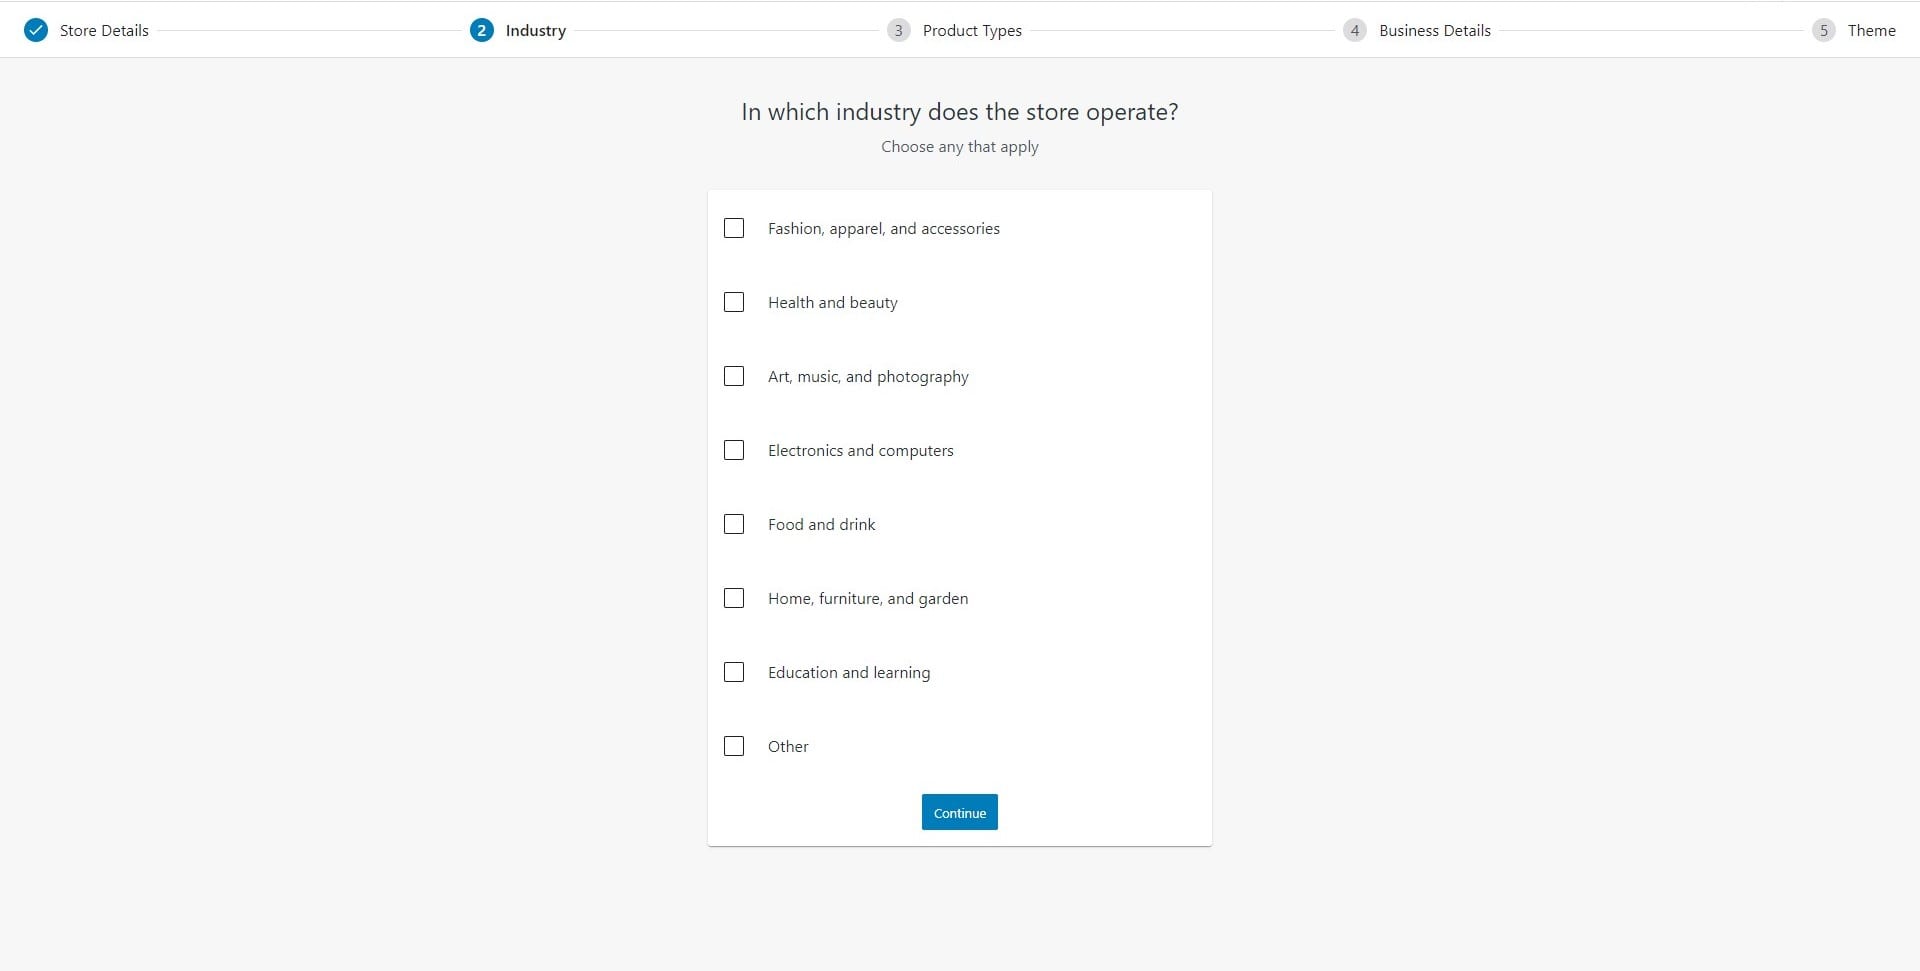
Industry
In the next step, you will have to select the industry field your store will operate. By default, WooCommerce provides you with 7 pre-made choices and Other option choice where you input your field of operating.
Product types
The next step is to select the products that your store will have, and if you want there are also additional features that can be applied with additional payment. Those features are the additional plugins you might need to install after you choose one of these features.
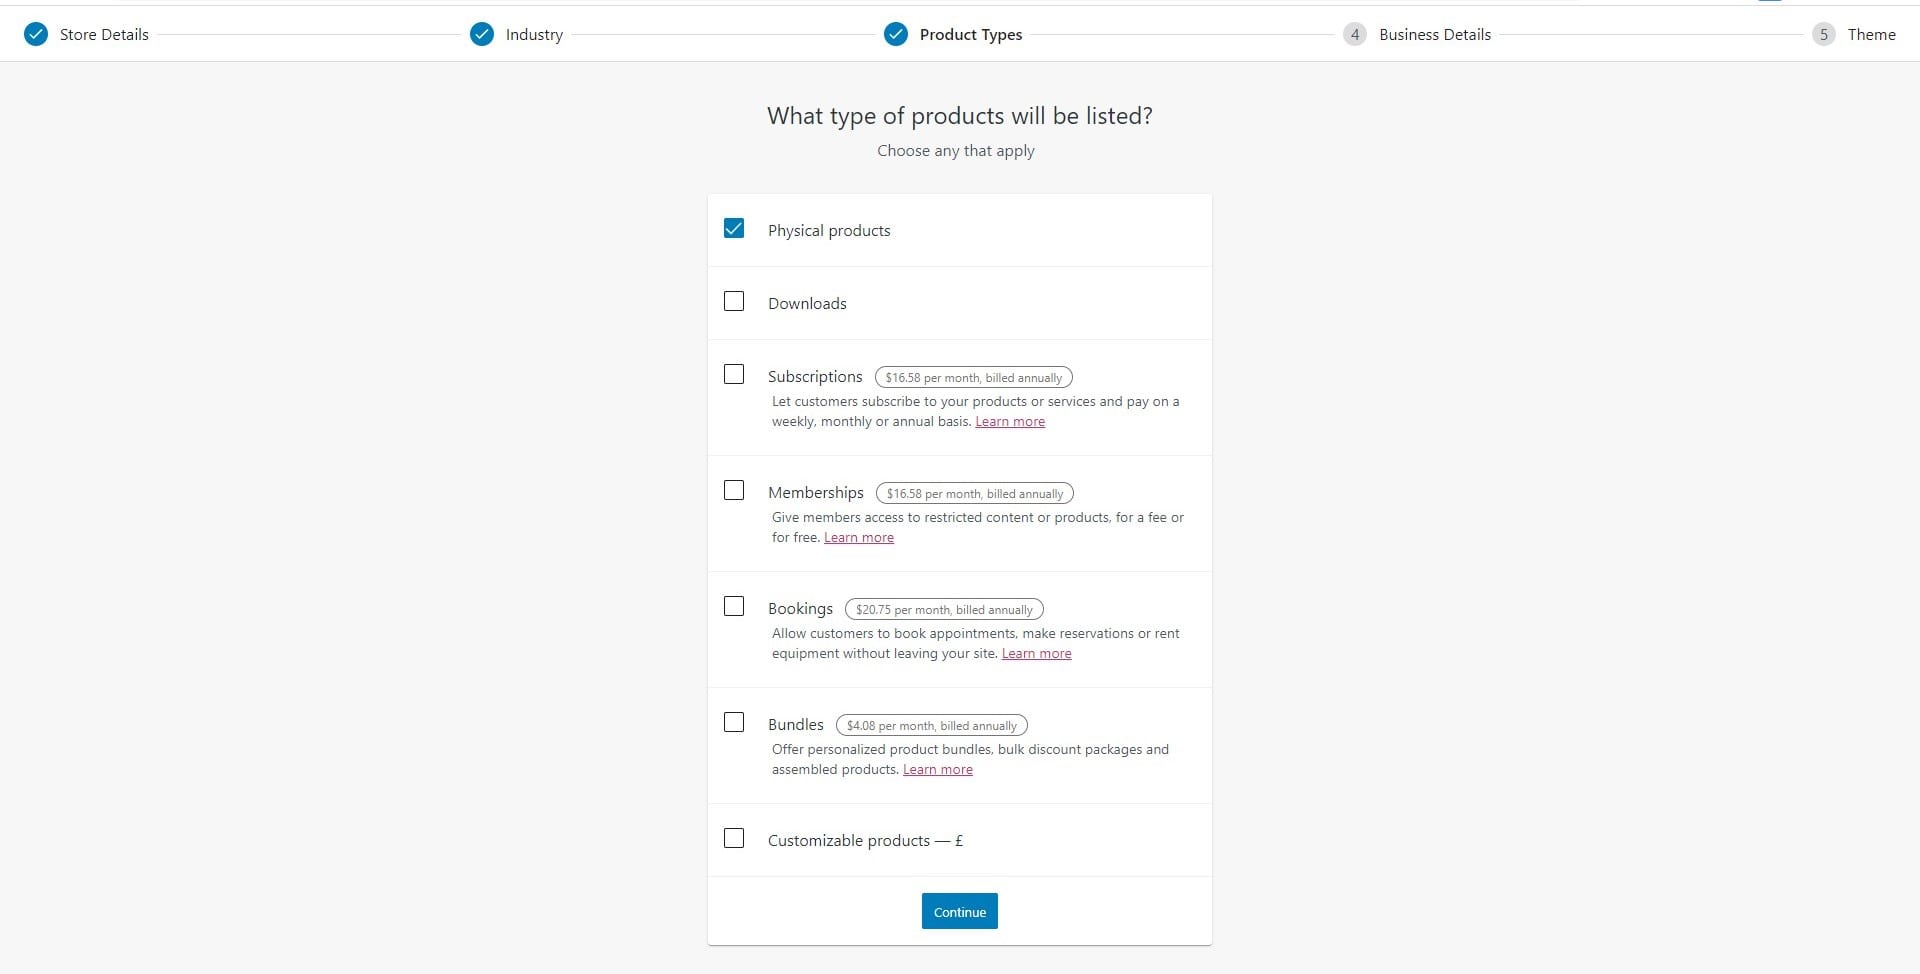
As you can see Subscription, Memberships, Bookings, and Bundles are all paid product types, but it is not necessary to use these plugins- you can try and search for third-party plugins.
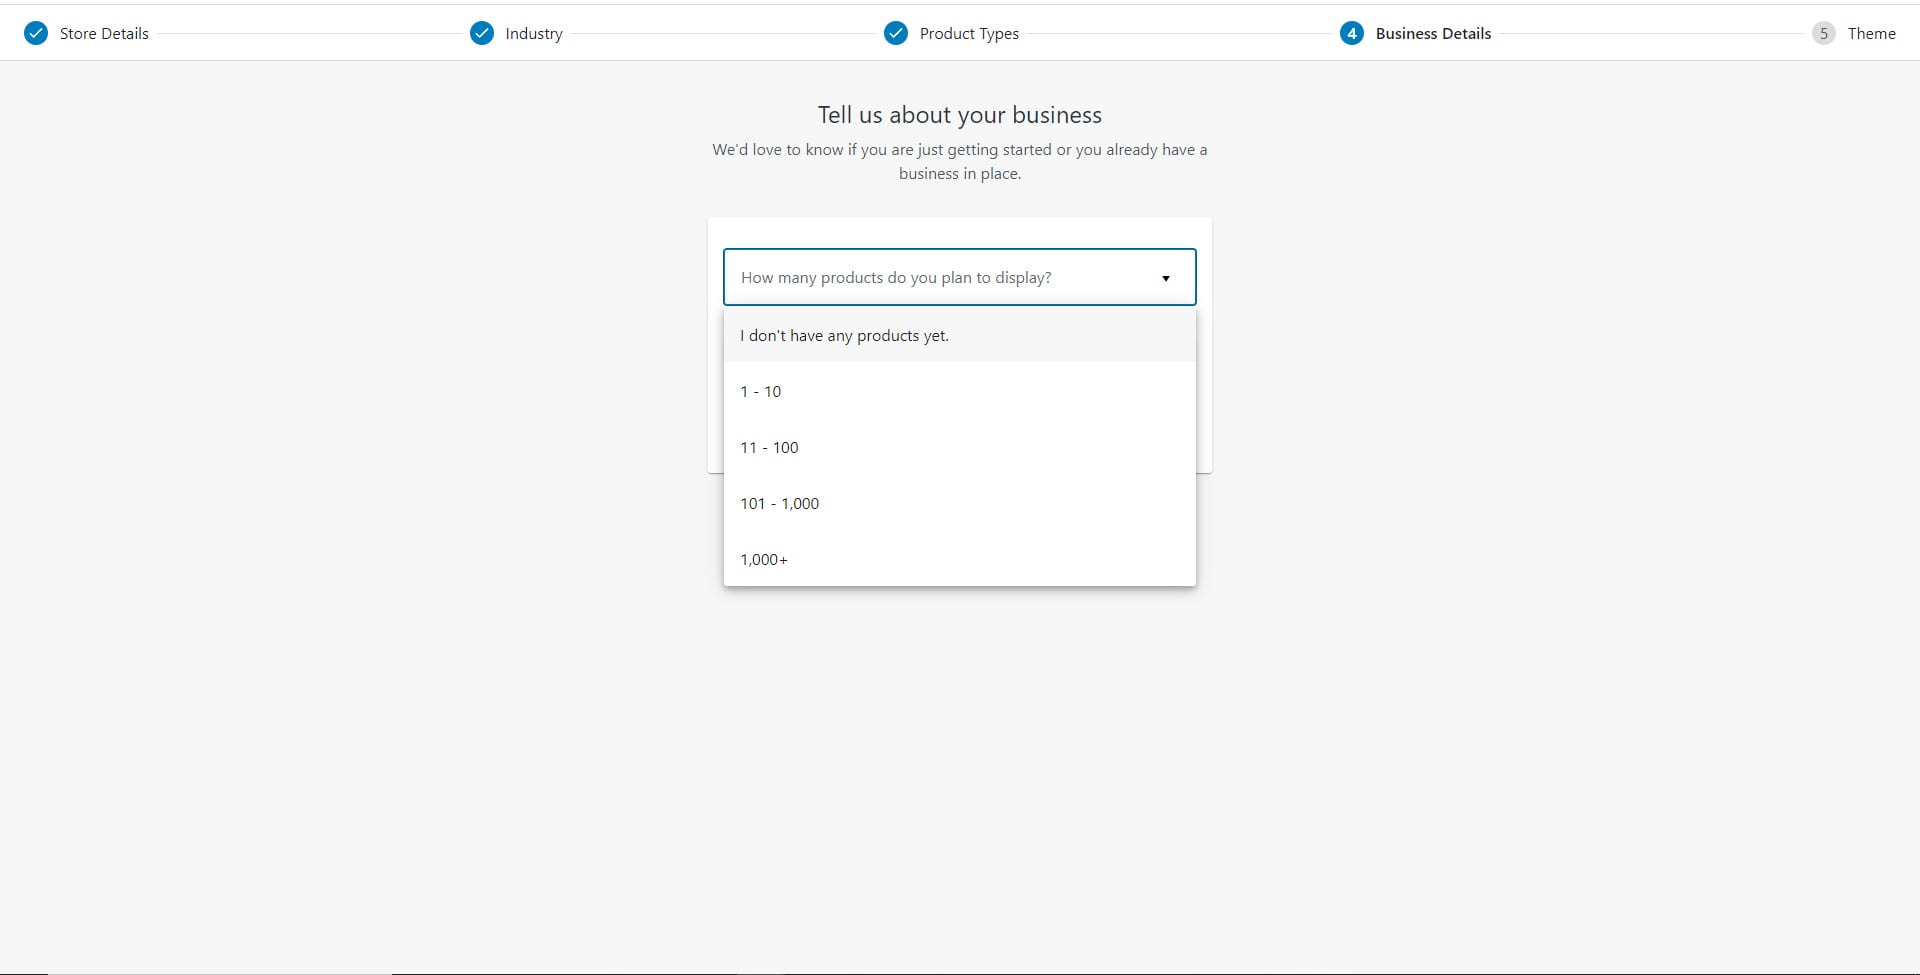
Business details
The next step is clarifying how many products do you have if you have no products yet you can choose the corresponding option.
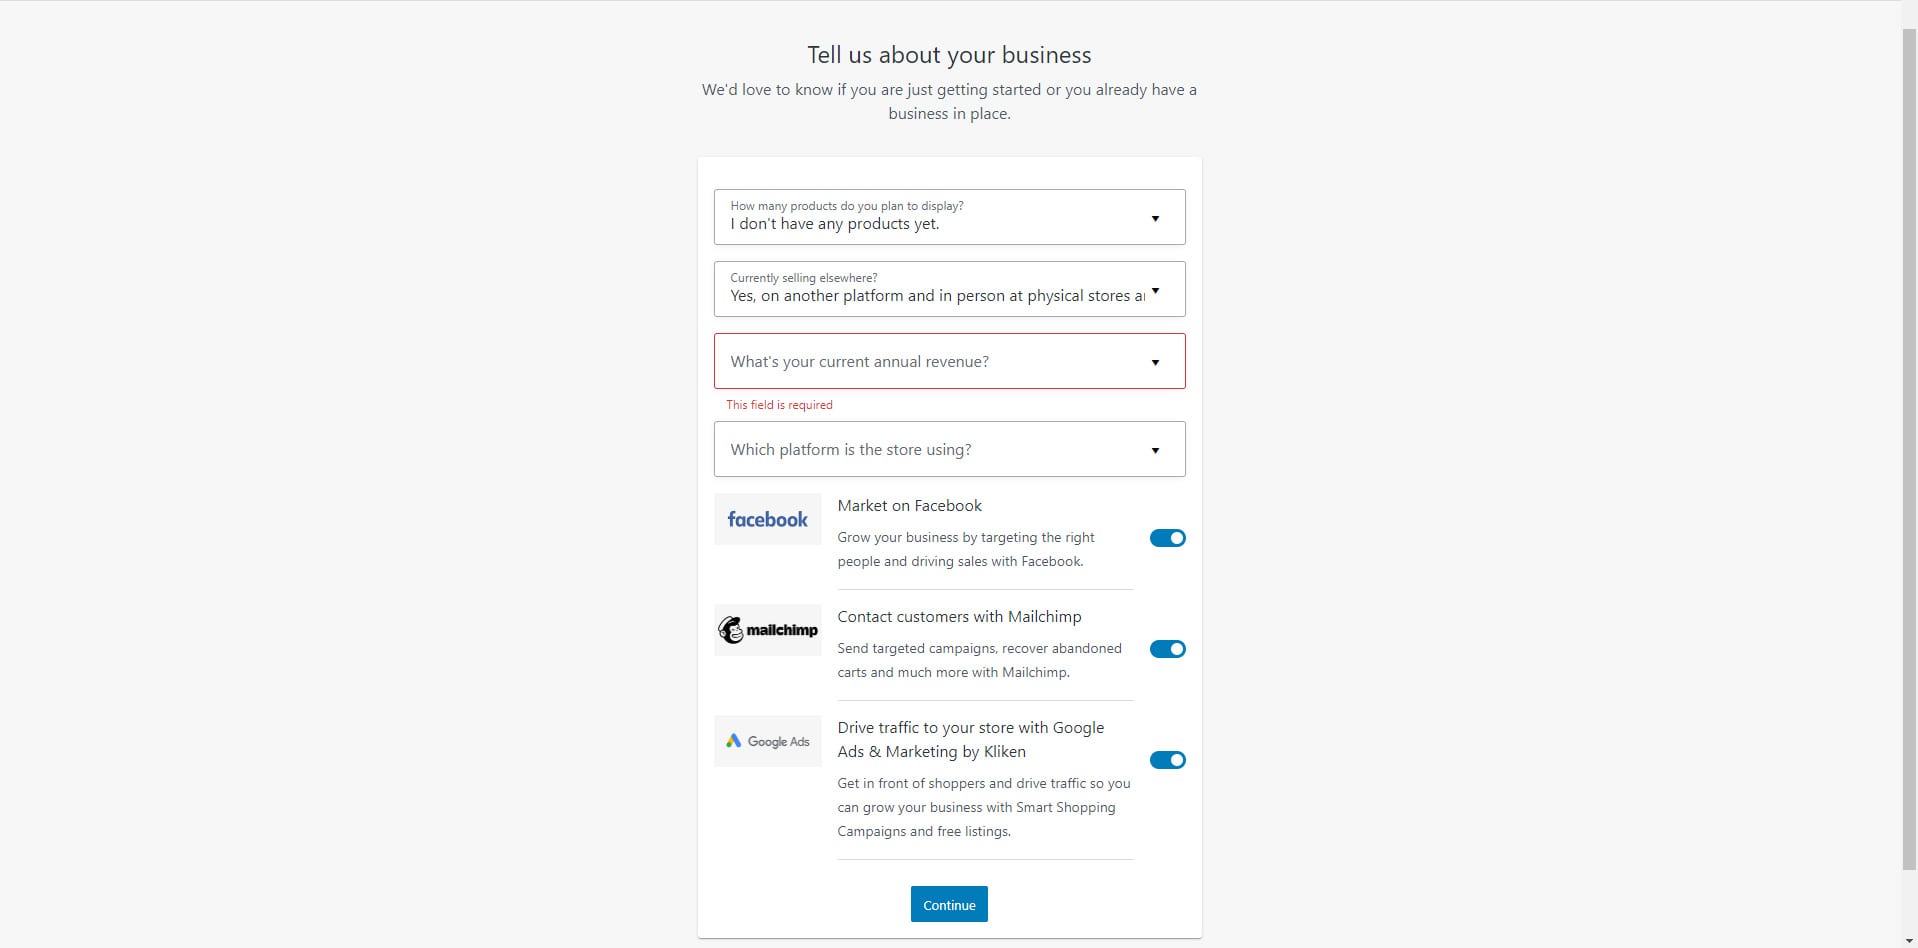
The next field is asking if you are already selling something online or you have a physical store. As well as it will ask if you want to use plugins provided by WooCommerce or is partners for your online store if you do not want it do not forget to turn them off.
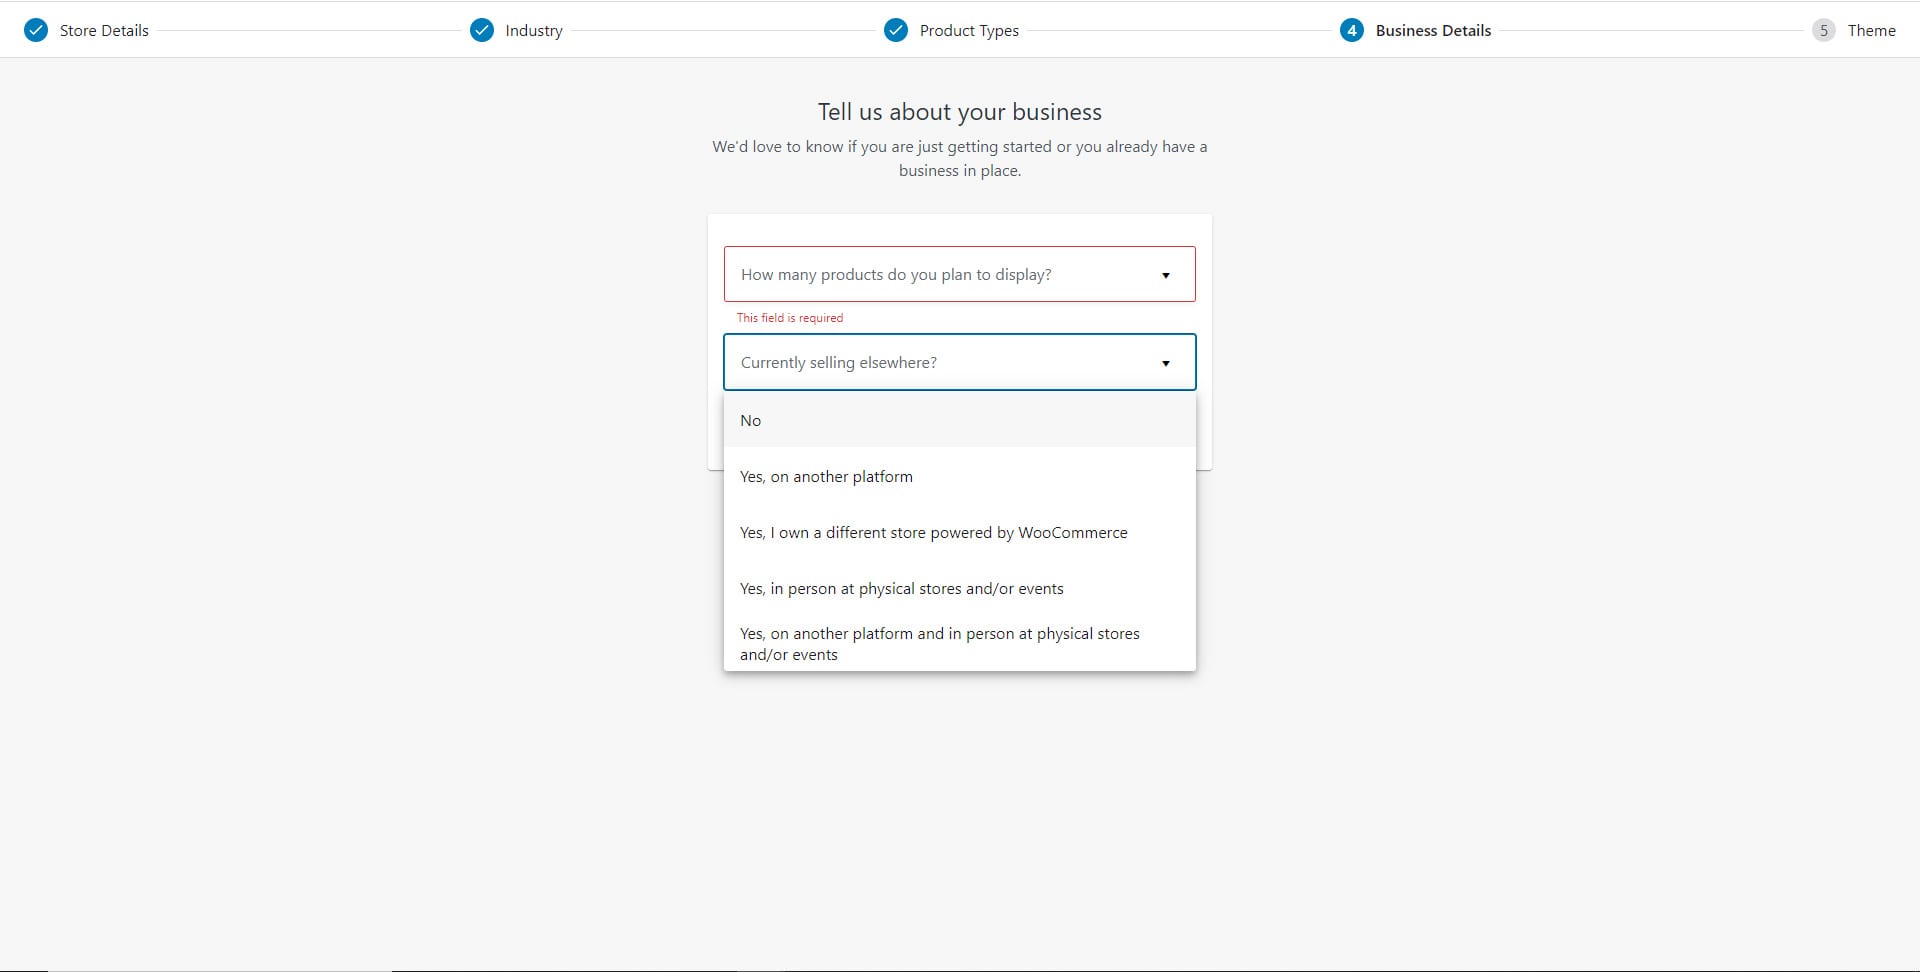
By choosing any other option except for No you will be asked what’s your annual revenue and if it is not a WooCommerce store which platform you are using for it.
Themes
The last step is optional you can skip it if you do not plan on using themes. There are two types of themes paid and free for you to choose from. These themes are all WooCommerce friendly.
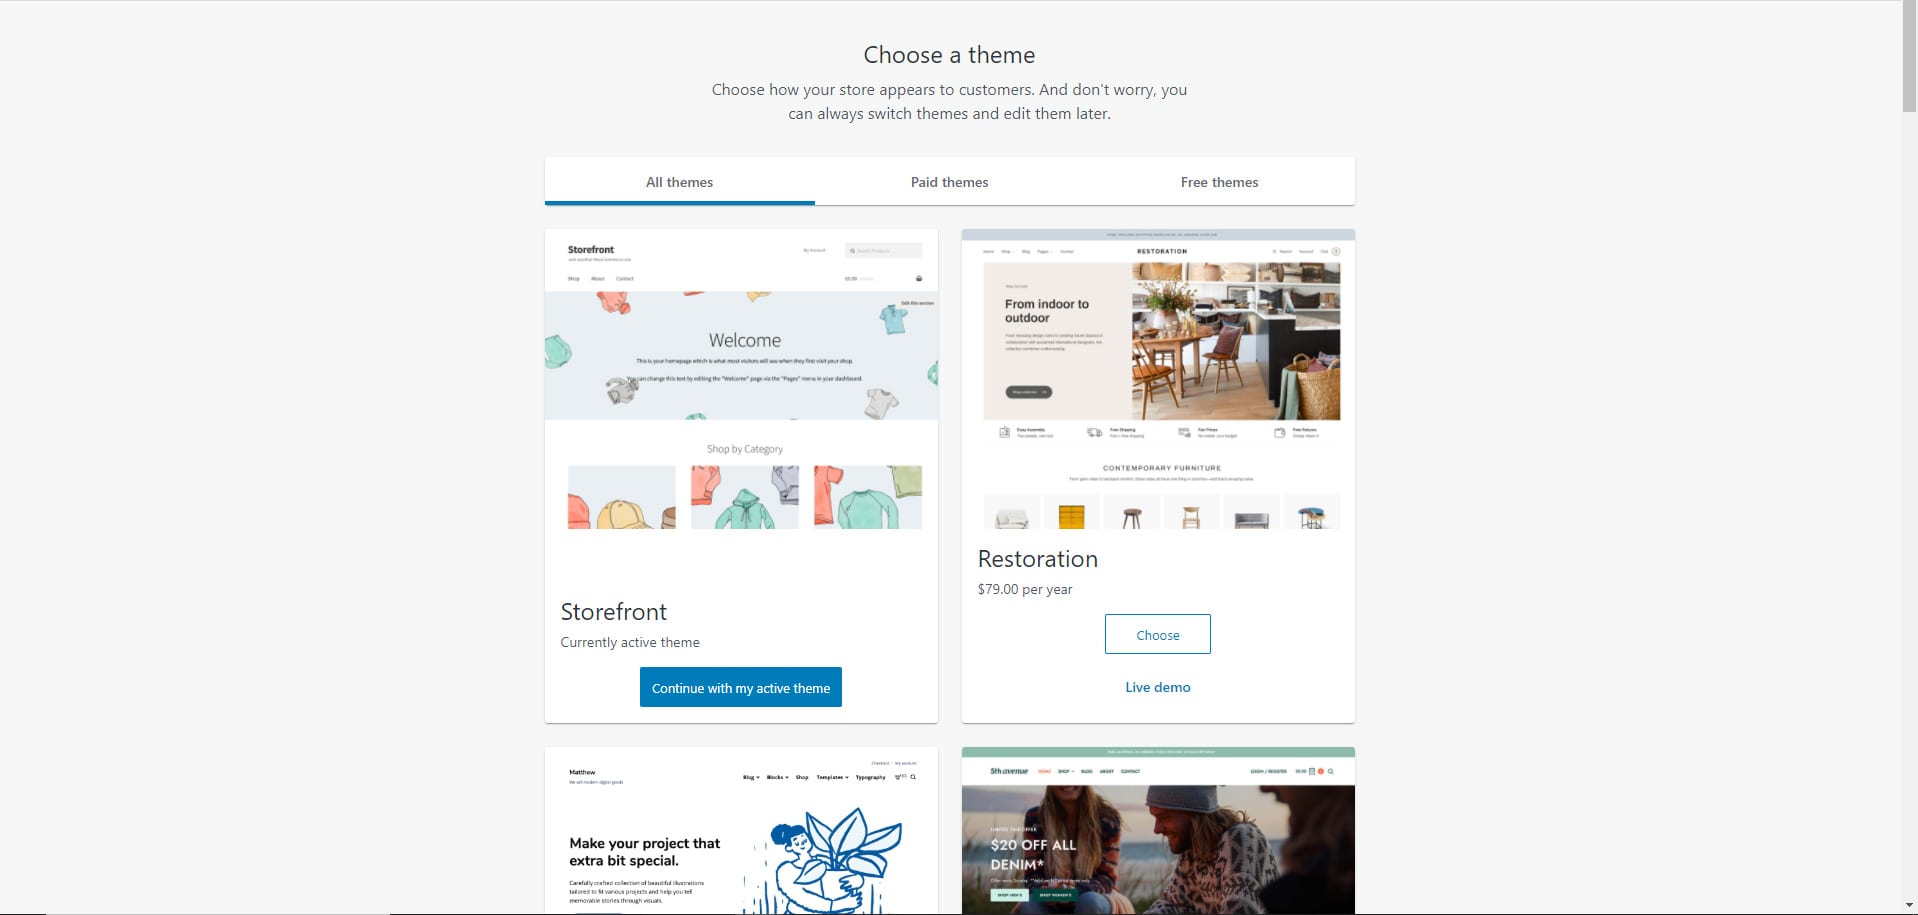
If you plan on adding your own theme you need to be sure that the theme you are adding is secure and WooCommerce friendly.
Finishing up
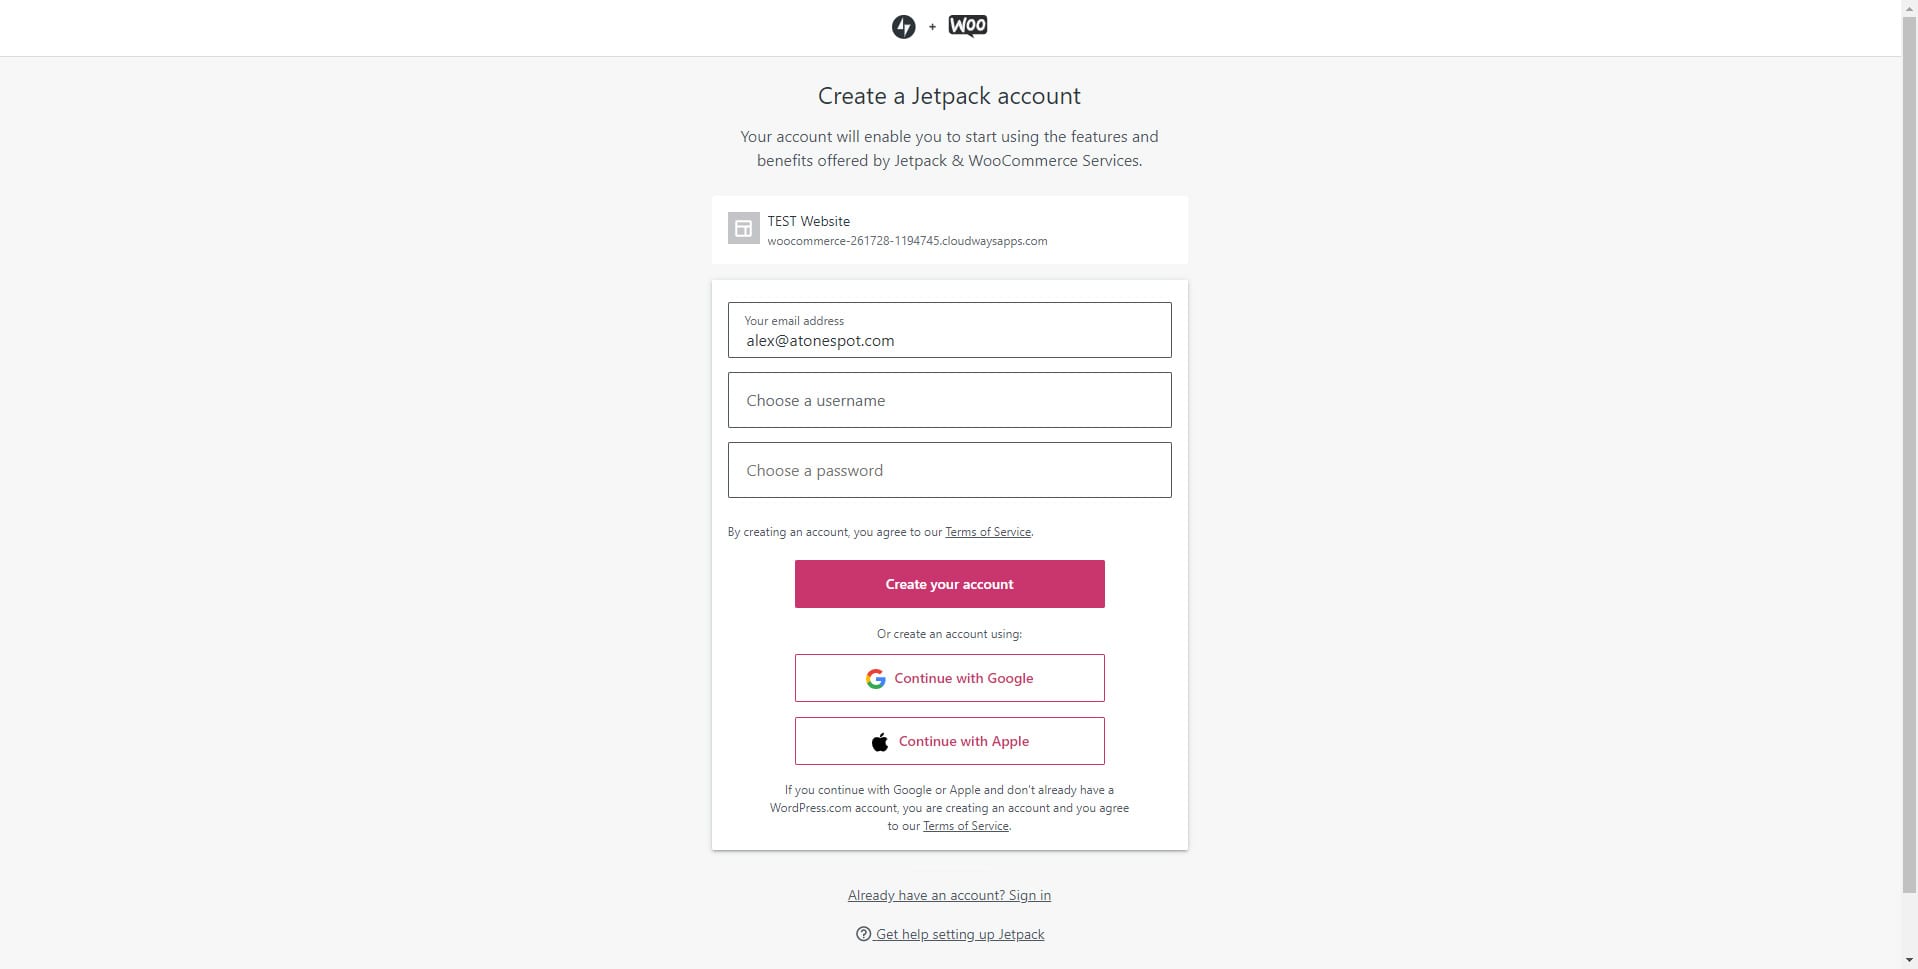
Now that you are here for the last step, you can see that it asks you to Create a Jetpack account or enter using an existing one.
Configuring WooCommerce Plugin
Now, we will see some of the configurations that you might need. In this section, we will see how you can change the settings with ease.
Just open your Dashboard and head over to WooCommerce > Settings.
This is the place where you will see all the information that you entered during the setup wizard. There are various tabs that you can use.
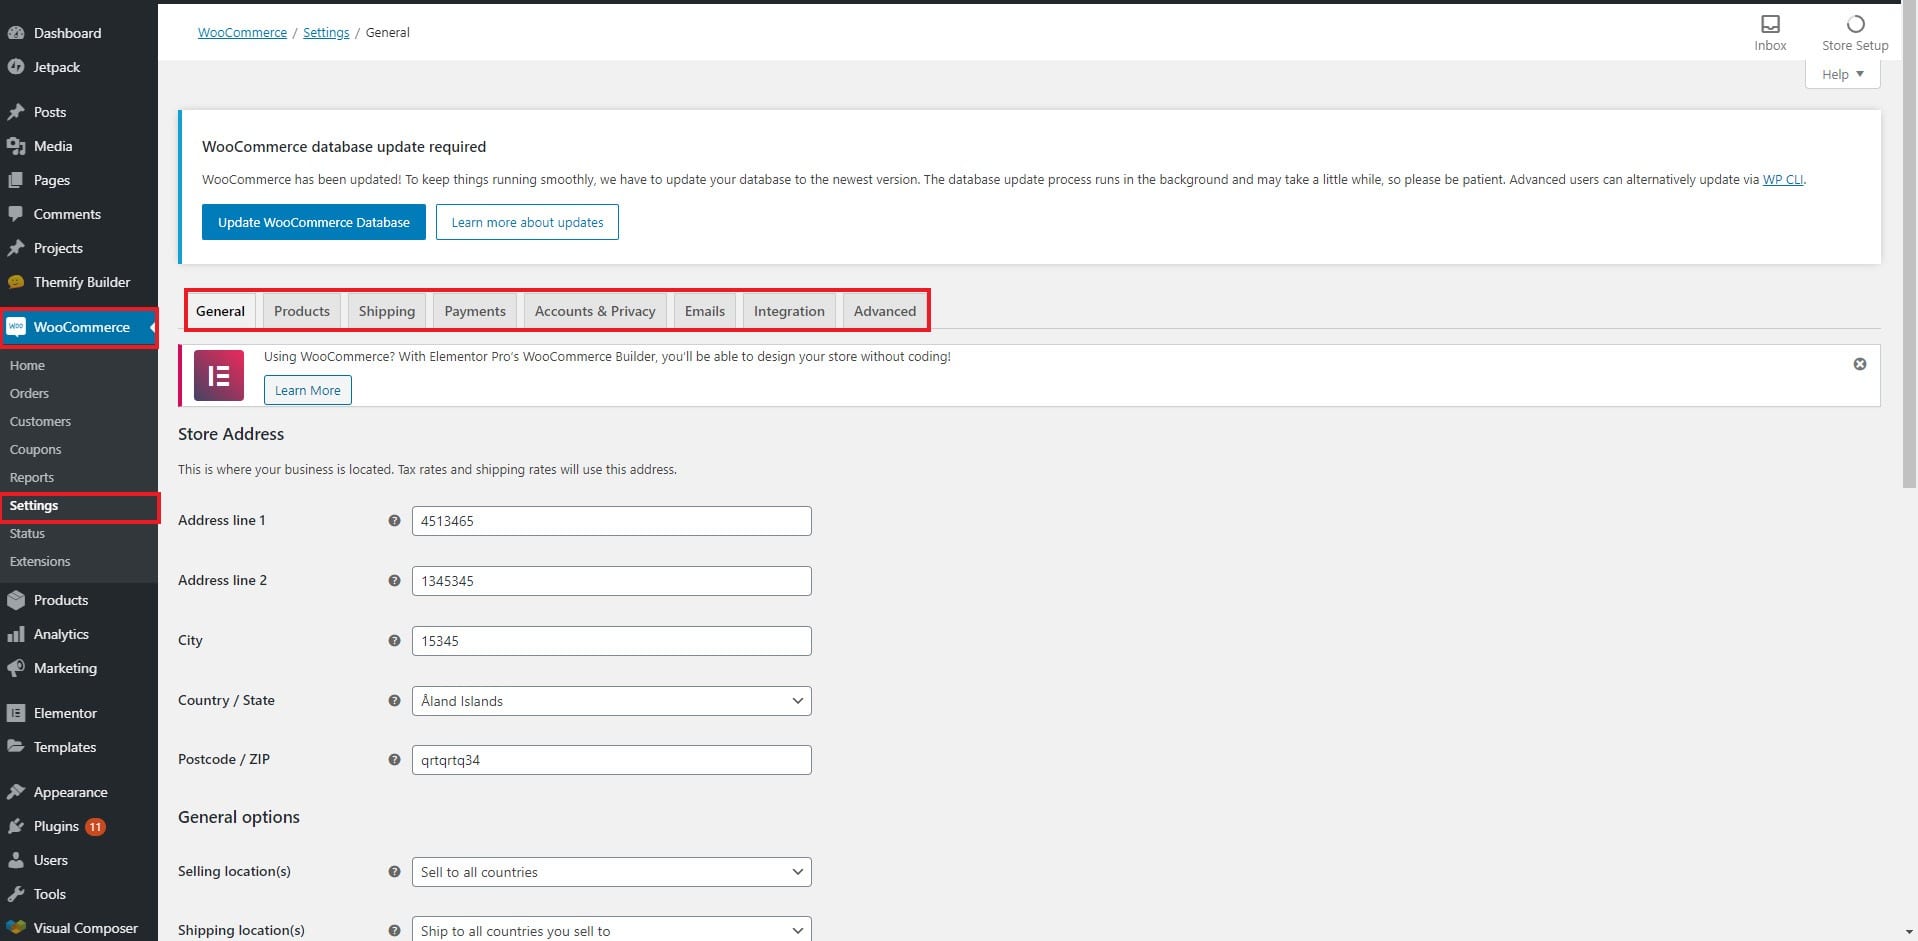
General Tab: You can change the general information such as your store name, description, currency, etc
Products: Products page is all about changing the product information. This covers the placeholder image, product measurements, etc. Further, you can also select whether anyone can leave a review or not.
Shipping: You can manage the shipping here. It also has sub-tabs where you can manage the shipping options and shipping classes.
Payments: You can add/manage the payment gateways from here
Account and Privacy: This is the place where you can allow users to place an order without registering an account. Further, you can manage extra information about the account. You can choose whether the user would be able to remove their data or not. There are many options that you might require. It is highly recommended that you check this page.
Advanced: In this tab, you can change the pages and end-points. Like we saw in the setup, WooCommece will create some pages. If you want to change the page, you can do it from here. If you want to change any of the WooCommerce pages, you will first have to create a blank page. Thereafter, you can select that particular page from the options given init.
Creating your First Product
Your next job is to create the product. Adding a product is not a big deal. It is easy but if you are new, it will surely take some of your time.
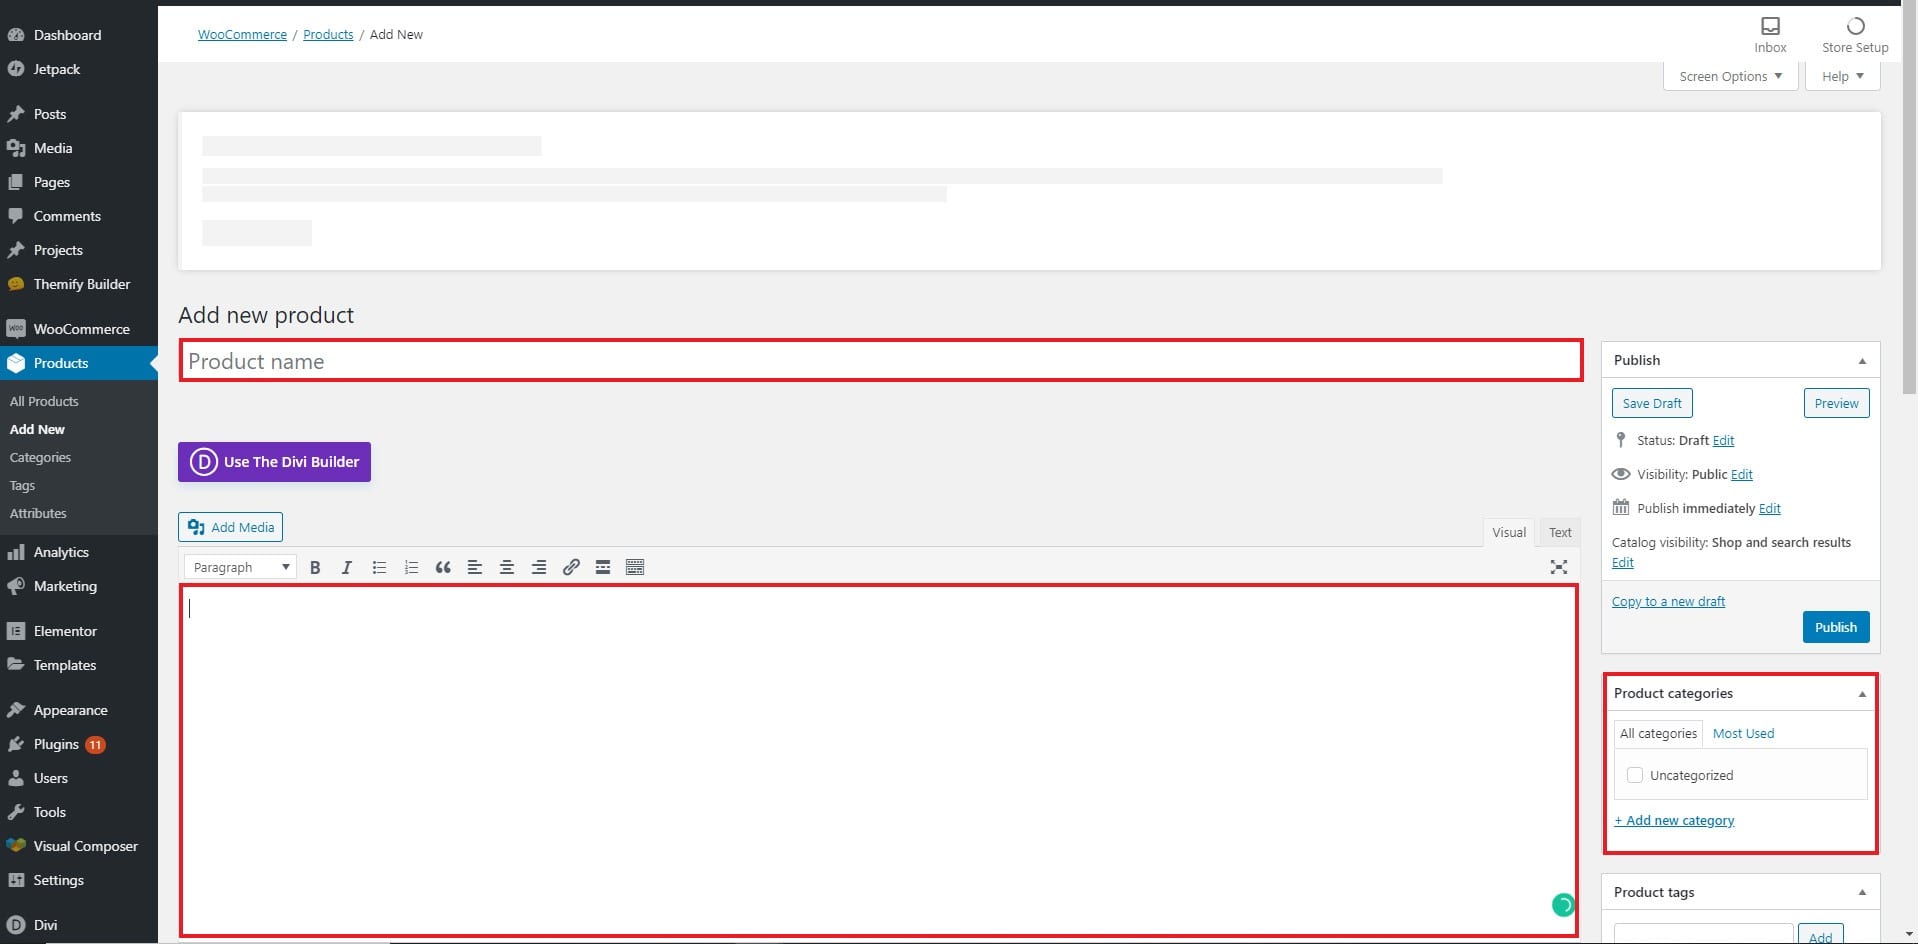
The first thing that you need to do is head over to Products > Add New.

Inside it, the interface will be much like the posts and the pages. So, if you are a WordPress user, it won’t be hard to fill up the details. However, if you are new, here is a quick guide to help you.
- The title is where you will enter the title of the product
- You can write the product description inside the big space given at the bottom.
- From the right panel, you can select the category of the product. You can add it by the option called “Add New Category”. Below it, you can select the featured image. It is the same image that is shown on the shop page.
Product Type
There are various product types that you can select. We will see the information about all of them here.
Single Product: The first category is a single product. Here, you can add the product and the pricing will be the same.
Variable Product: If a product has more than attributes, you can select it as a variable product. For example, if you are selling T-shirts, it might have different colors, sizes, etc. This is known as a variable product.
Affiliate Product: If you are selling someone else’s product, you can select it as an affiliate product. Here, when the user will select “add to cart”, it will redirect them to the original website.
Downloadable Product: This is for the digital product.
Product Data
Once you select the product type, you will have to enter the product data. This will change depending on the product type. If you have selected a single product, you will see different data. In the same way, if you have selected the variable product, you will have to enter different information.
There are various tabs to make your work easier. You can enter all the information. The most important option is the pricing. Make sure you set the regular price of the product. Further, you can also set sale prices to increase sales. If you have selected a variable product, you will have to enter the attributes such as size, shape, color, etc. You can set a different price for each attribute.
Stuff like inventory and advanced options are optional. Depending on the store, you can set them if required.
Once you do all the things, hit the publish button the sidebar and your product will be live on the store.
Moving Forward with WooCommerce
Now that you have completed the setup, we will now see what are the next things that you need to do. The original WooCommerce setup tutorial ends here. These are the next things you can do to run your store.
- Install the WooCommerce plugins related to stats, marketing, and payment gateway. You can also get some advanced features using it. There are thousands of plugins related to WooCommerce, you can have a look at some of them and install the ones that you need.
- Do the SEO of WooCommerce products.
- Speed up the website and make it responsive
- Do the marketing to get customers.
- Learn the other concepts needed for WooCommerce such as SKU, grouped products, variable products, etc
Final Words
To conclude, this was the WooCommerce setup tutorial. You can try exploring WooCommerce more and you will find many amazing things about WooCommerce. You can generate coupon codes also using WooCommerce. You can see the WooCommerce orders by going to WooCommerce > Orders. In the same way, if you want to see the reports, you can go to WooCommerce > Reports. This will cover all the things. You can use the advanced reporting by installing Google Analytics. You can customize the WooCommerce theme by going to customize or theme options. The store can be accessed at example.com/shop. You can add this page to your menu.


